How to Set Up Your Own Email Address With Proton Mail and Cloudflare
A step-by-step guide to getting an email address on your own domain with Proton Mail, using Cloudflare for DNS, with every record explained in plain words.
Most email addresses are tied to the provider you signed up with. If you ever want to switch, you have to tell everyone your new address and update it on every account you own.
Having email on your own domain fixes that. The address belongs to you, not the provider. You can move to a different email service later and nobody even notices. I went with Proton Mail because of its focus on privacy, and I use Cloudflare to manage my domain’s DNS.
This guide walks through the whole setup with screenshots. The only slightly technical part is adding a few DNS records, and I’ll explain what each one actually does so you’re not just copying and pasting blindly.
What you need
- A domain name you own, like
yourname.com - A paid Proton plan. Custom domains don’t work on the free plan.
- Access to your domain’s DNS settings. I’m using Cloudflare here, but the steps are almost the same anywhere.
Set aside about 30 minutes, plus some waiting time for DNS to update.
Step 1: Sign up for Proton Mail
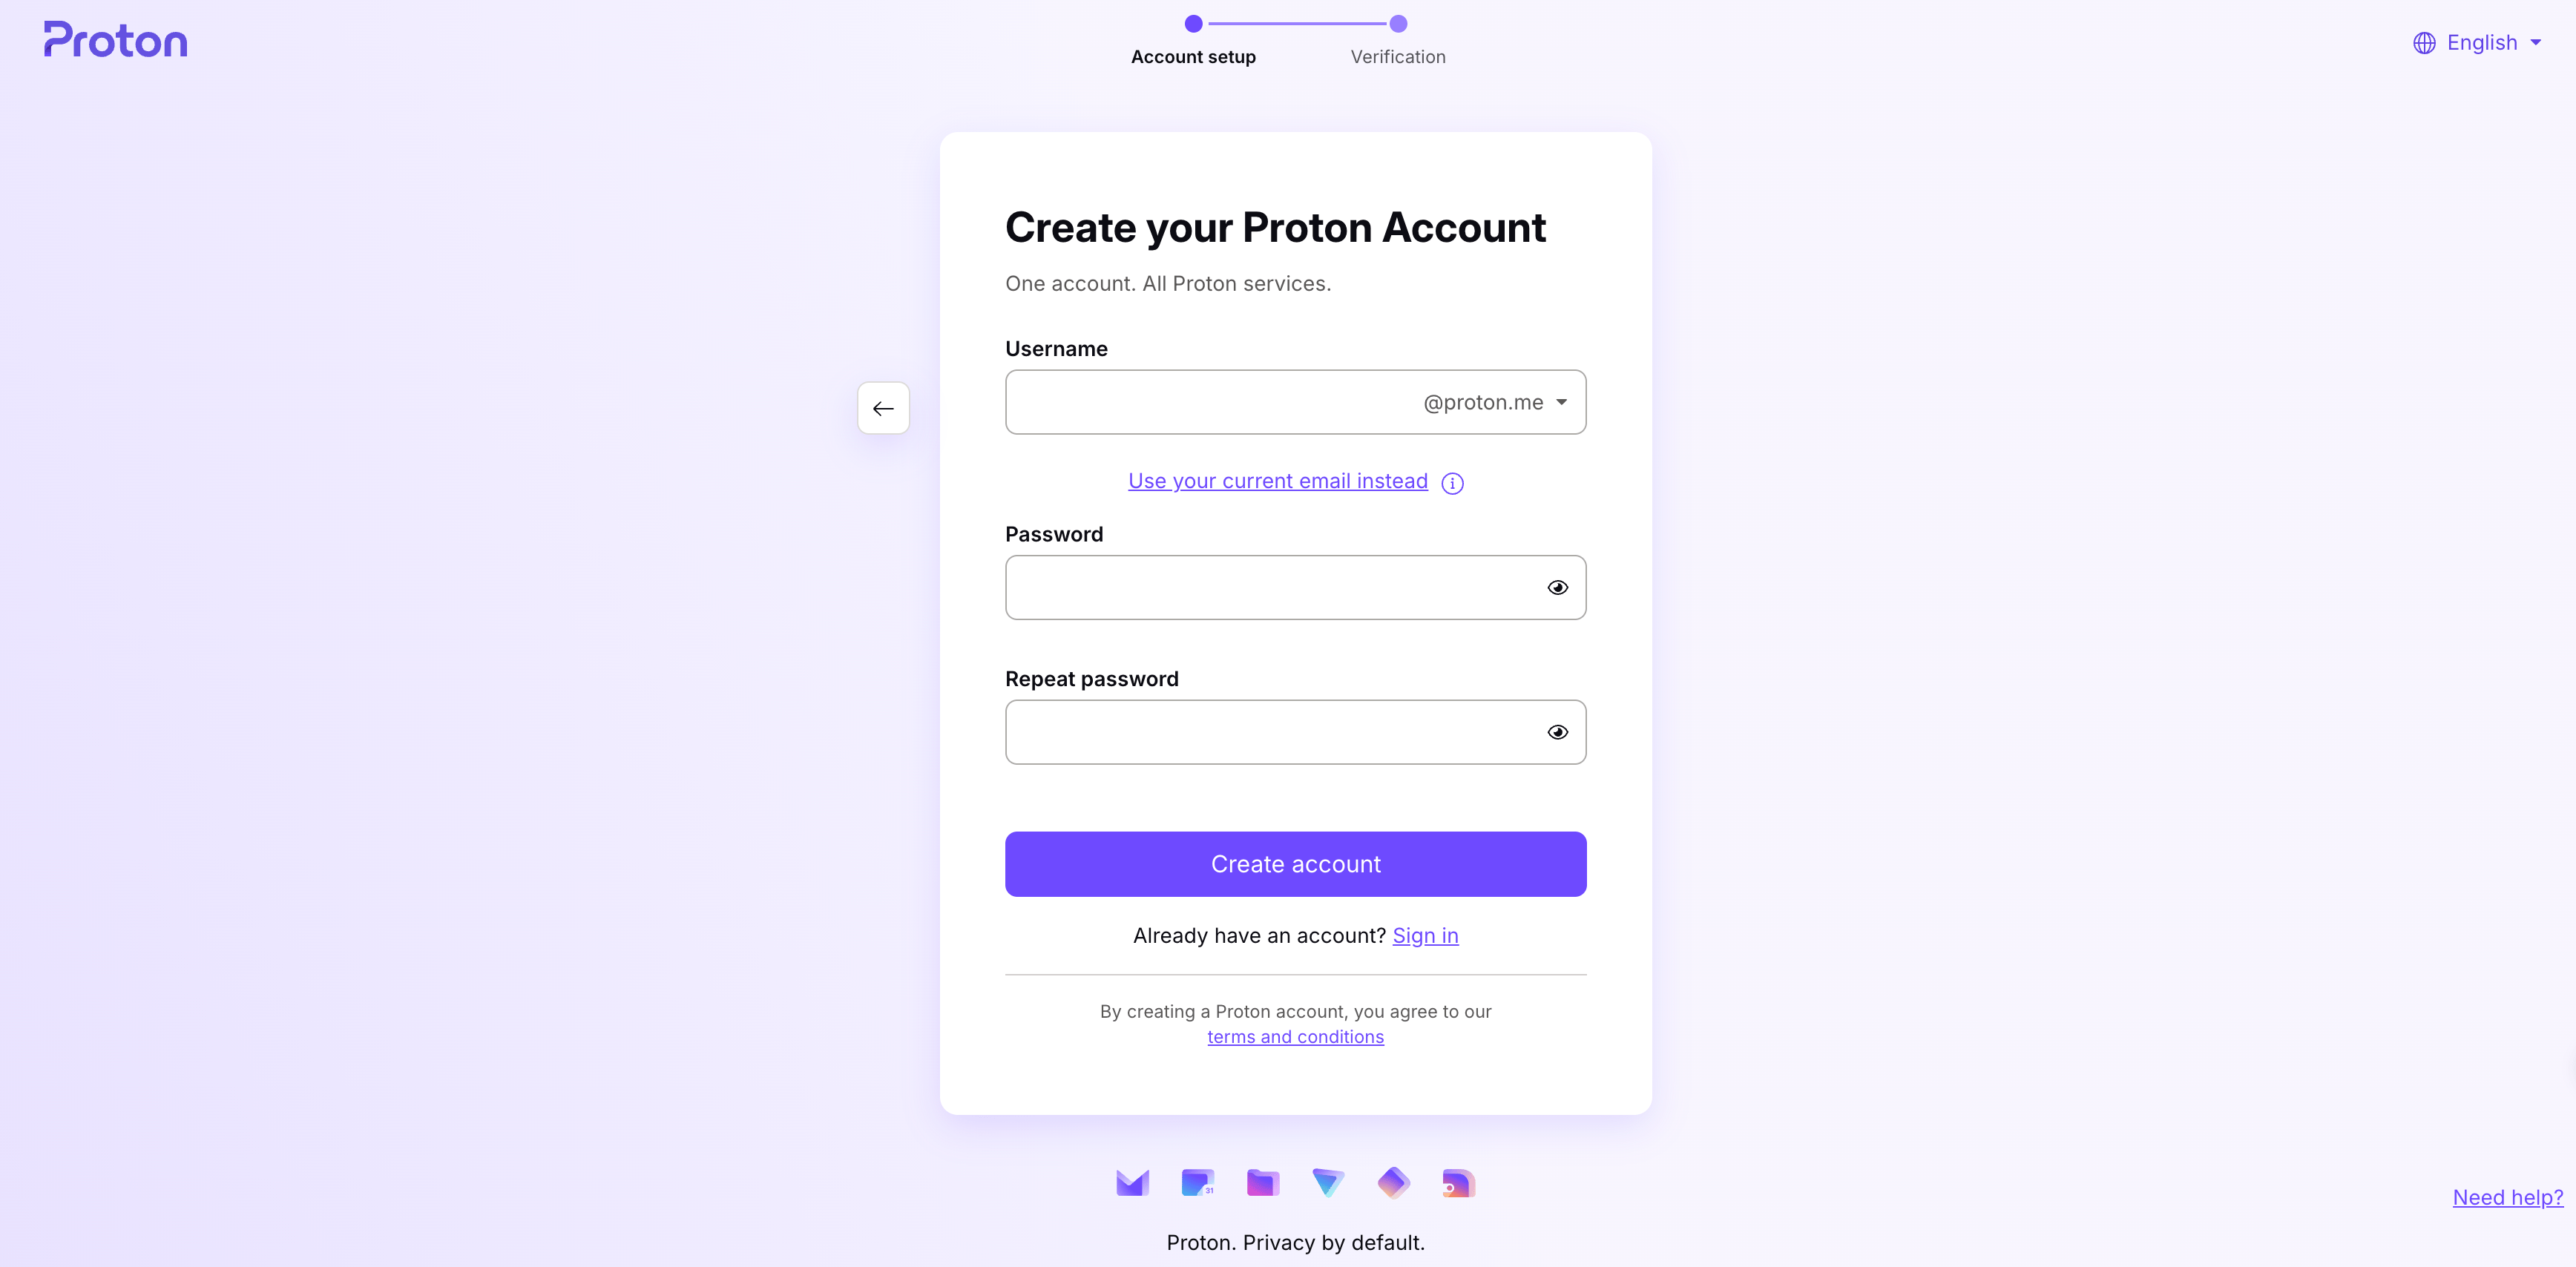
Go to Proton Mail, pick a paid plan, and finish signing up.
Step 2: Add your domain in Proton
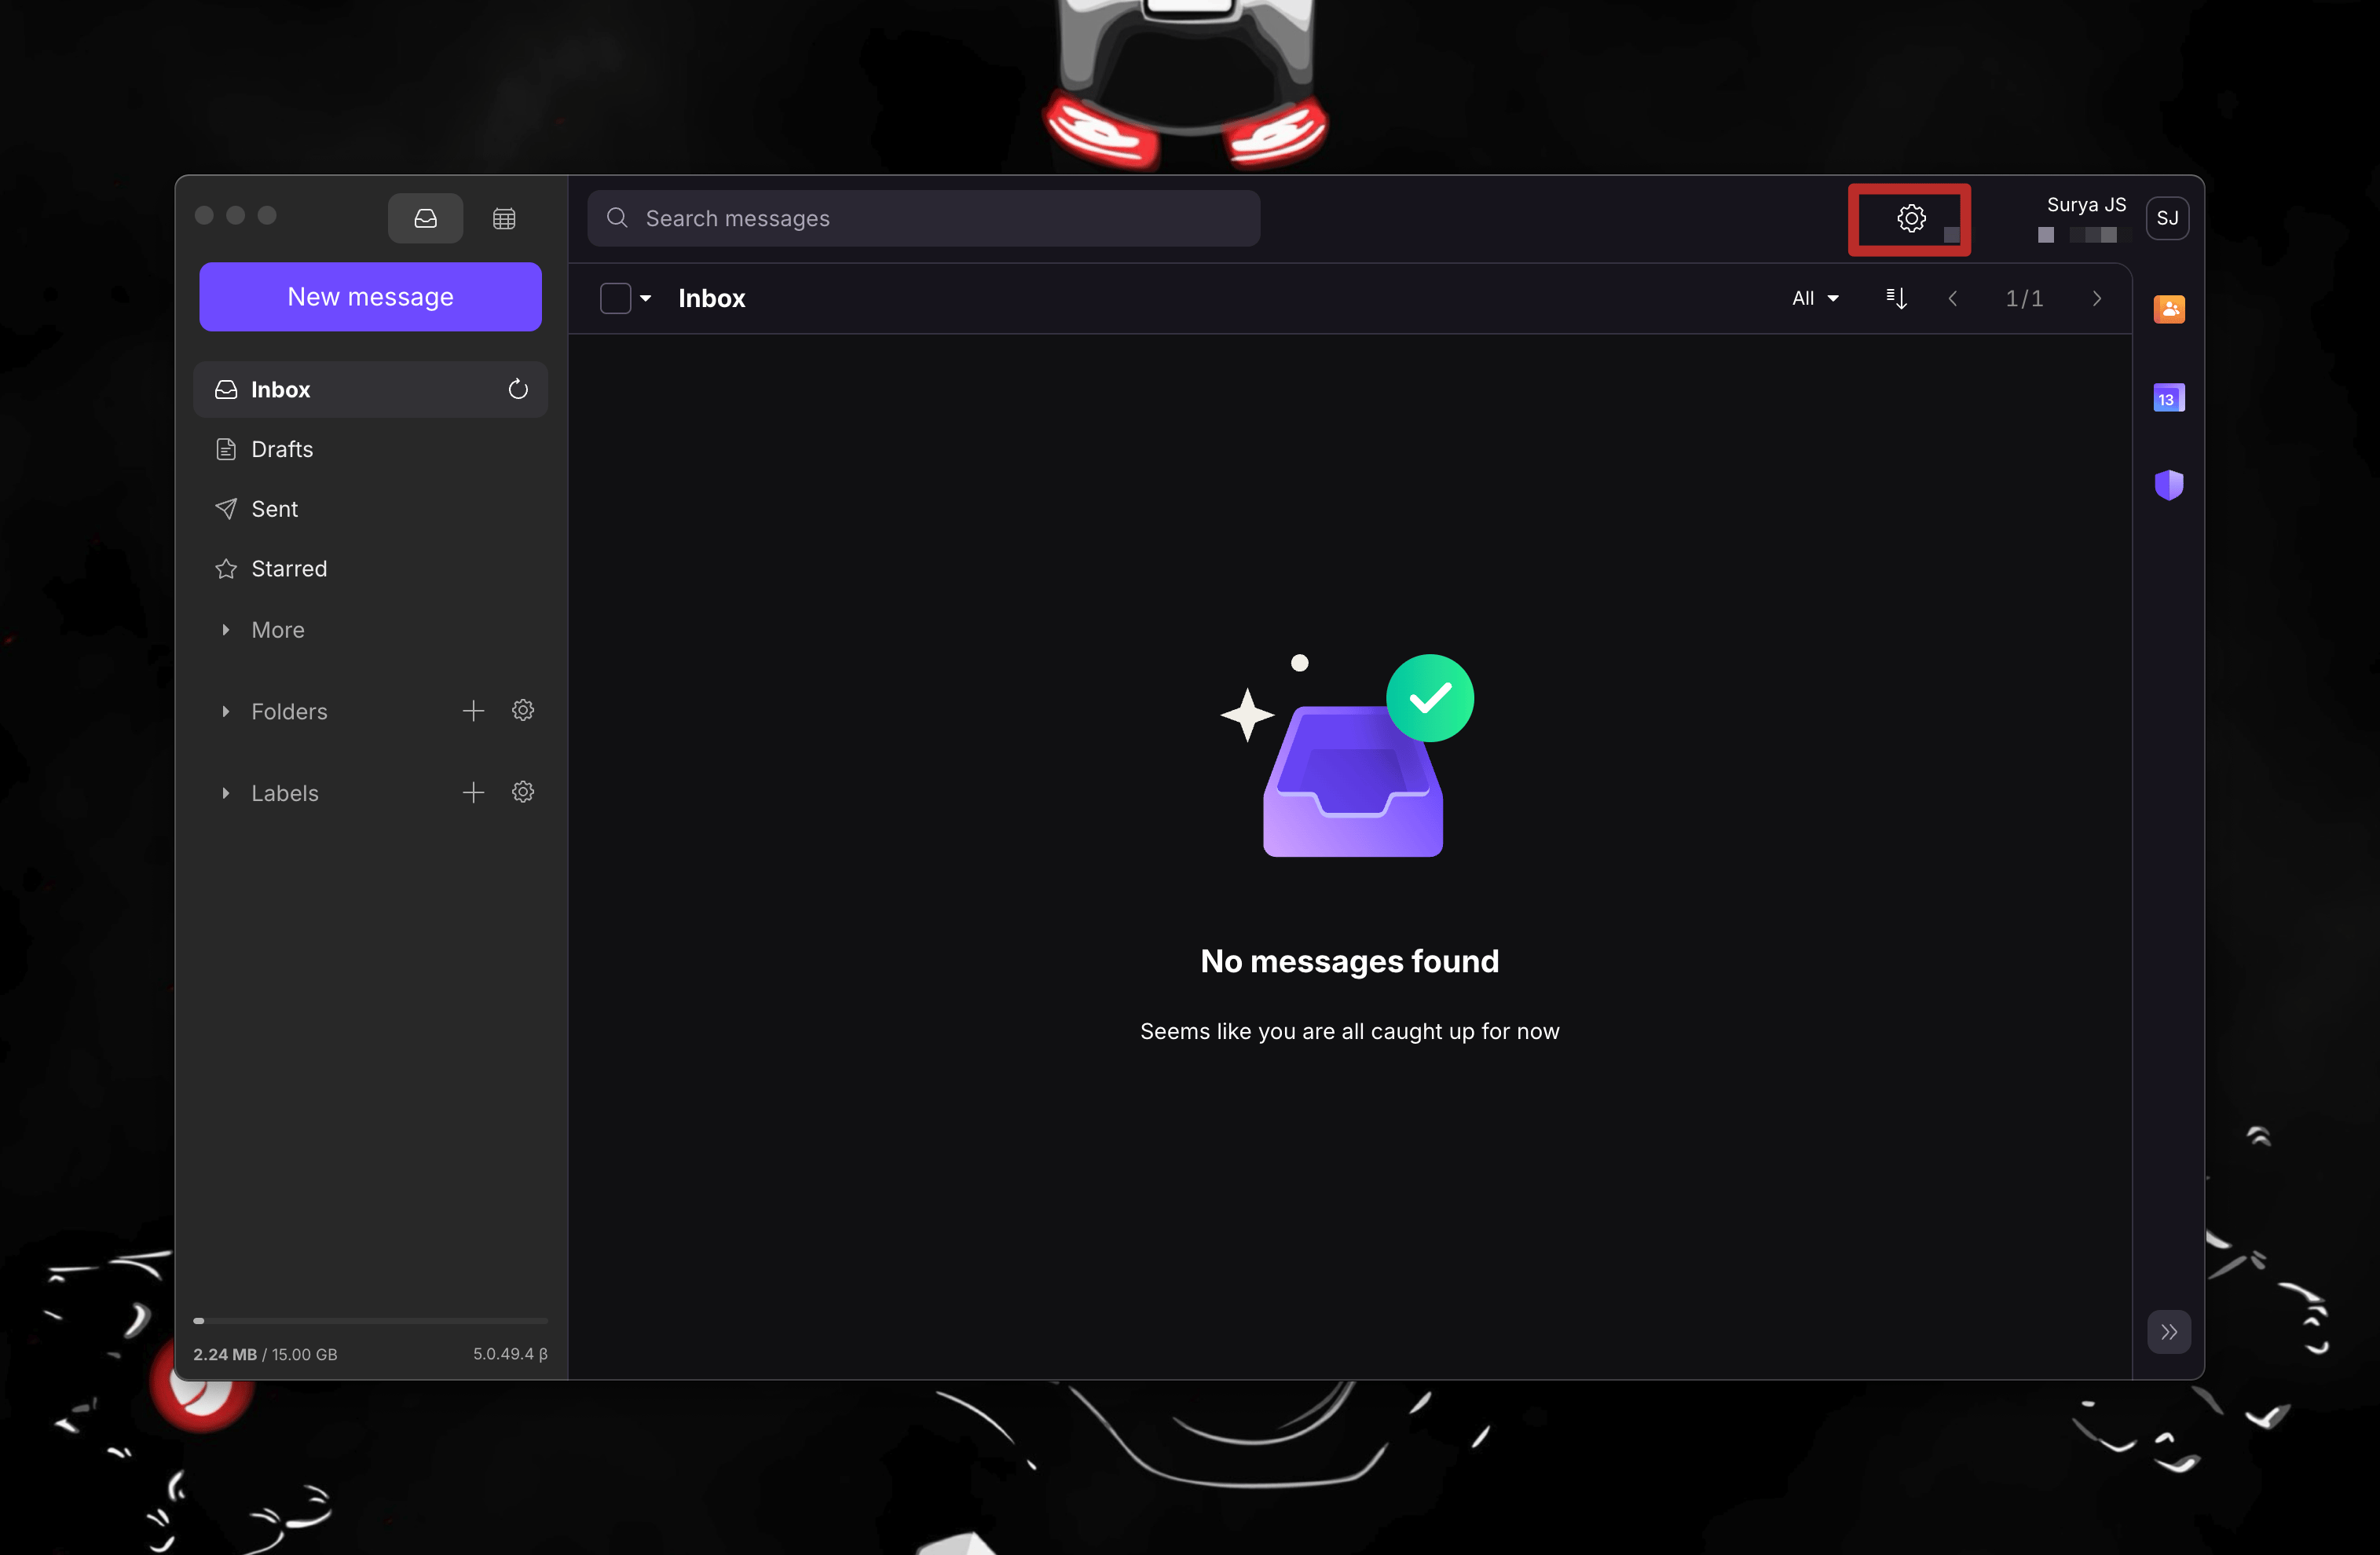
Log in and open Settings with the gear icon in the top-right corner.
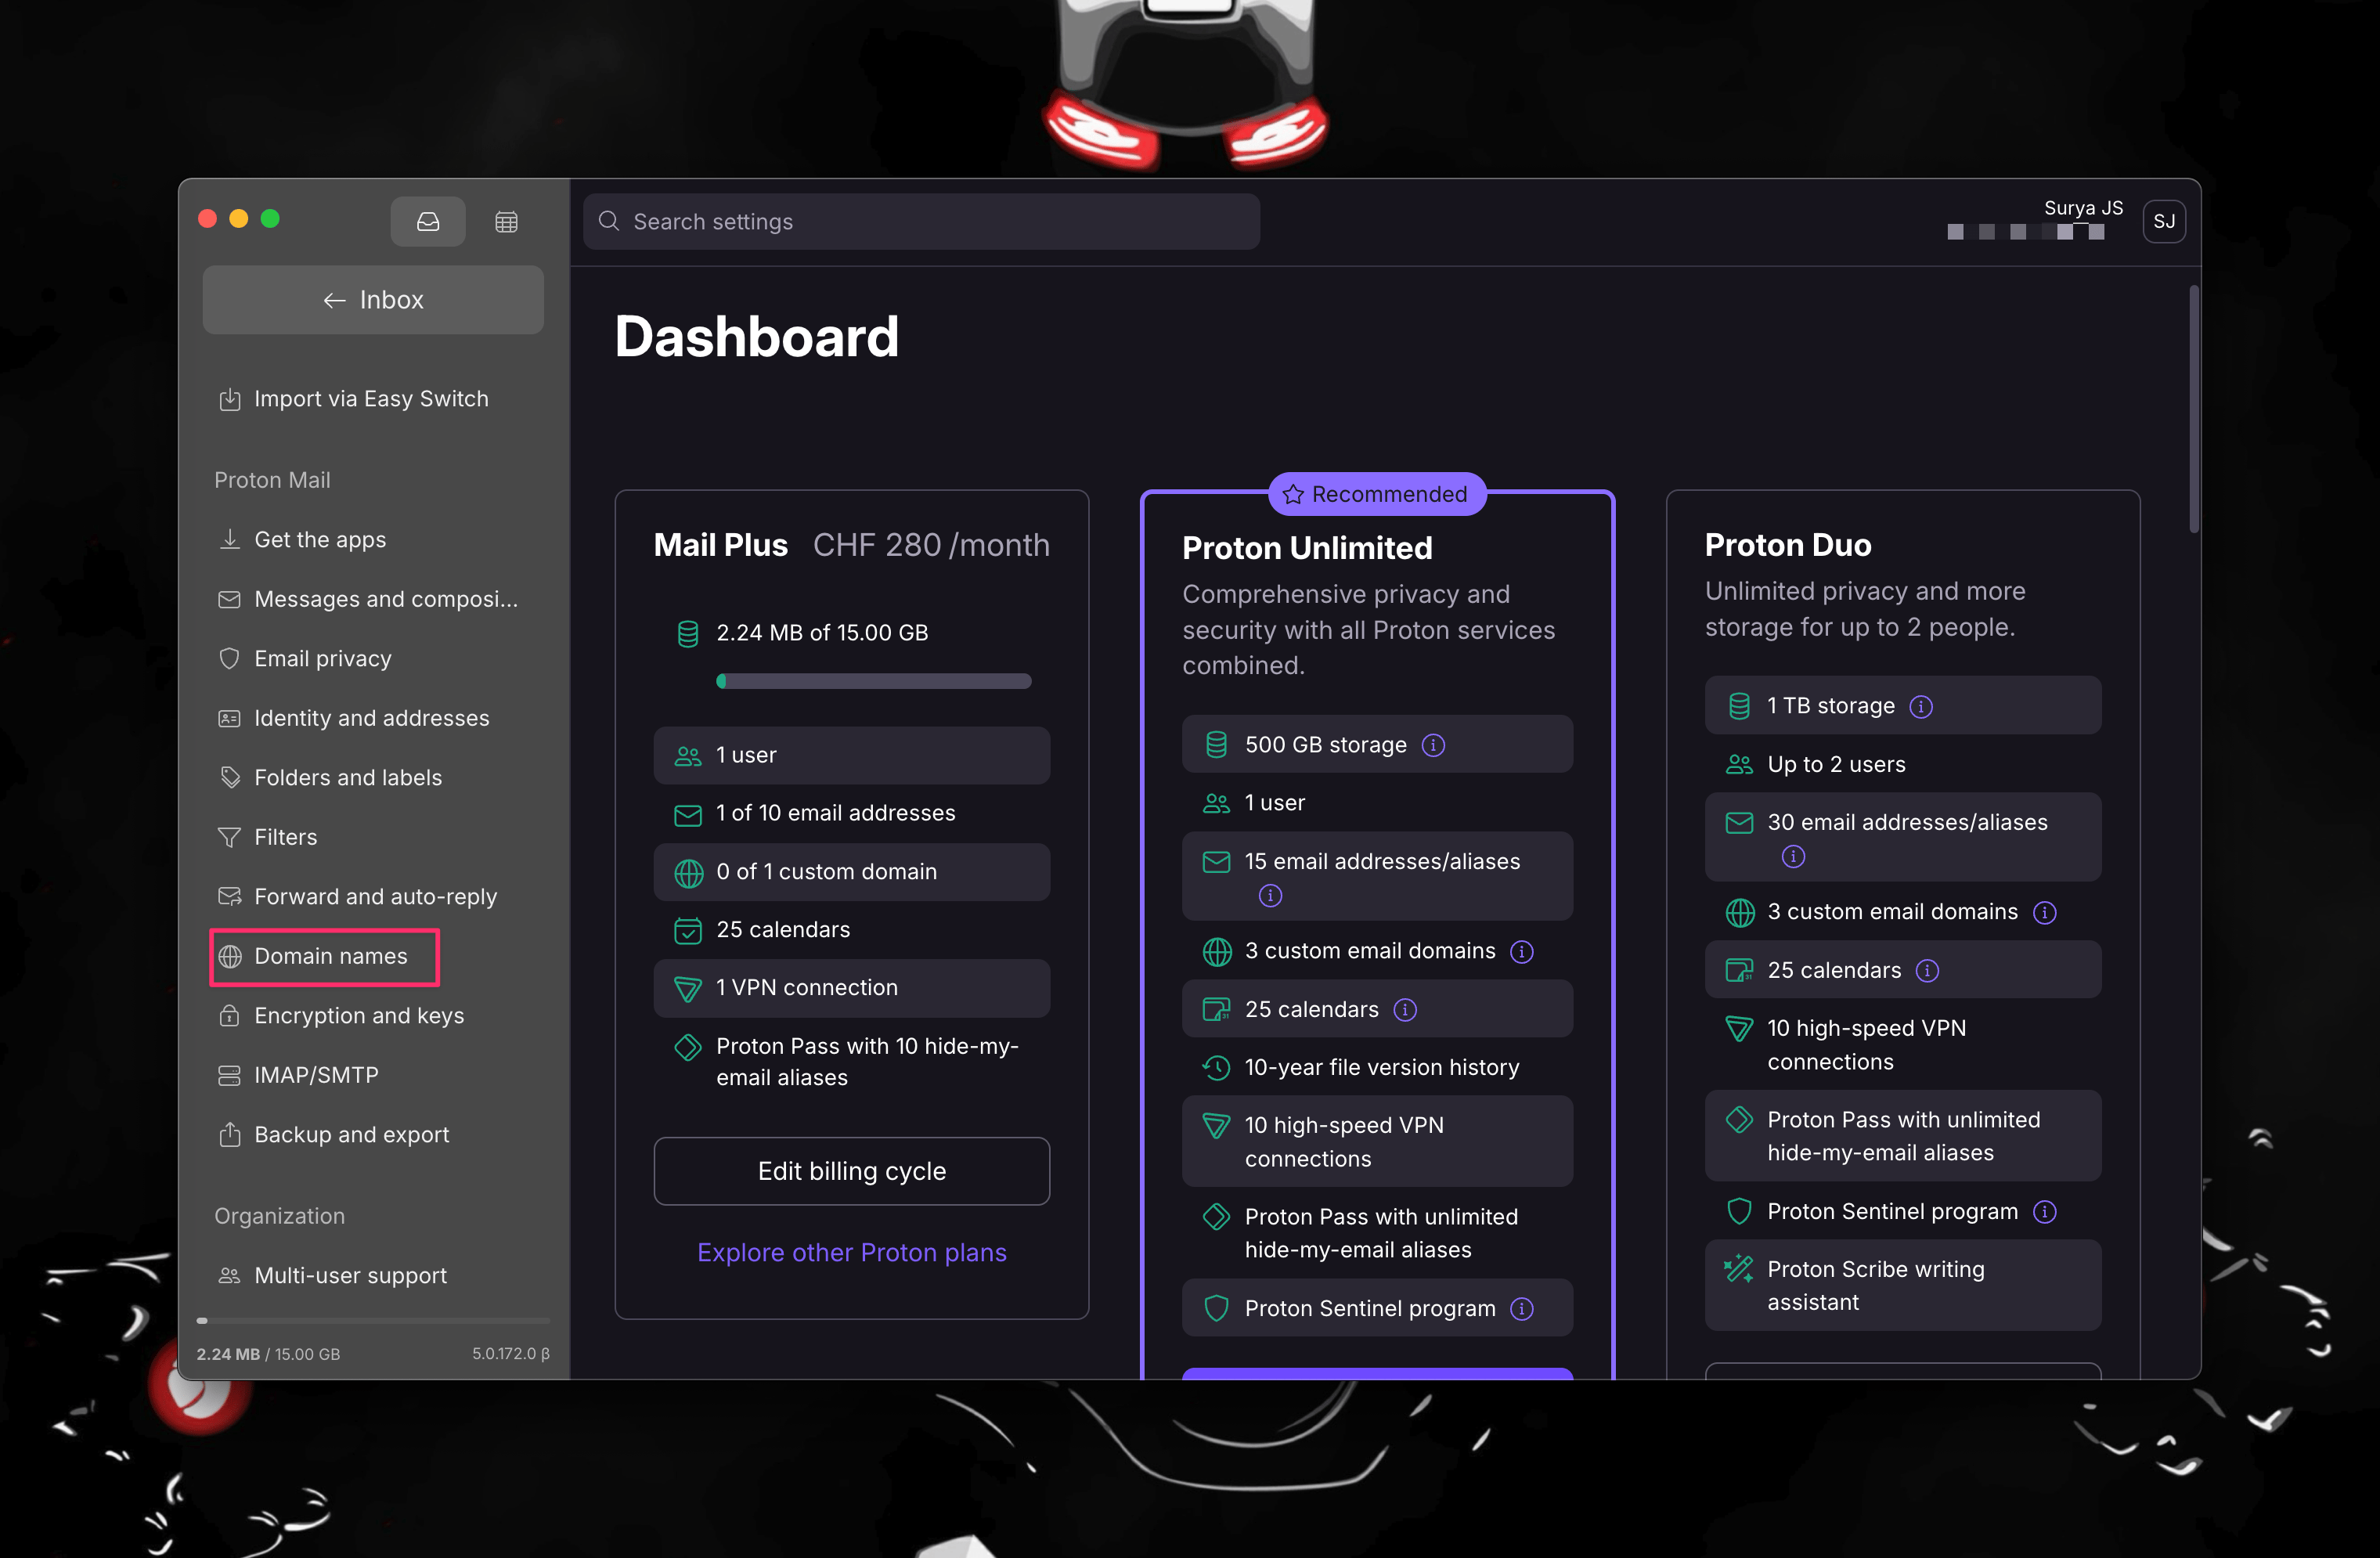
Go to Domain names.
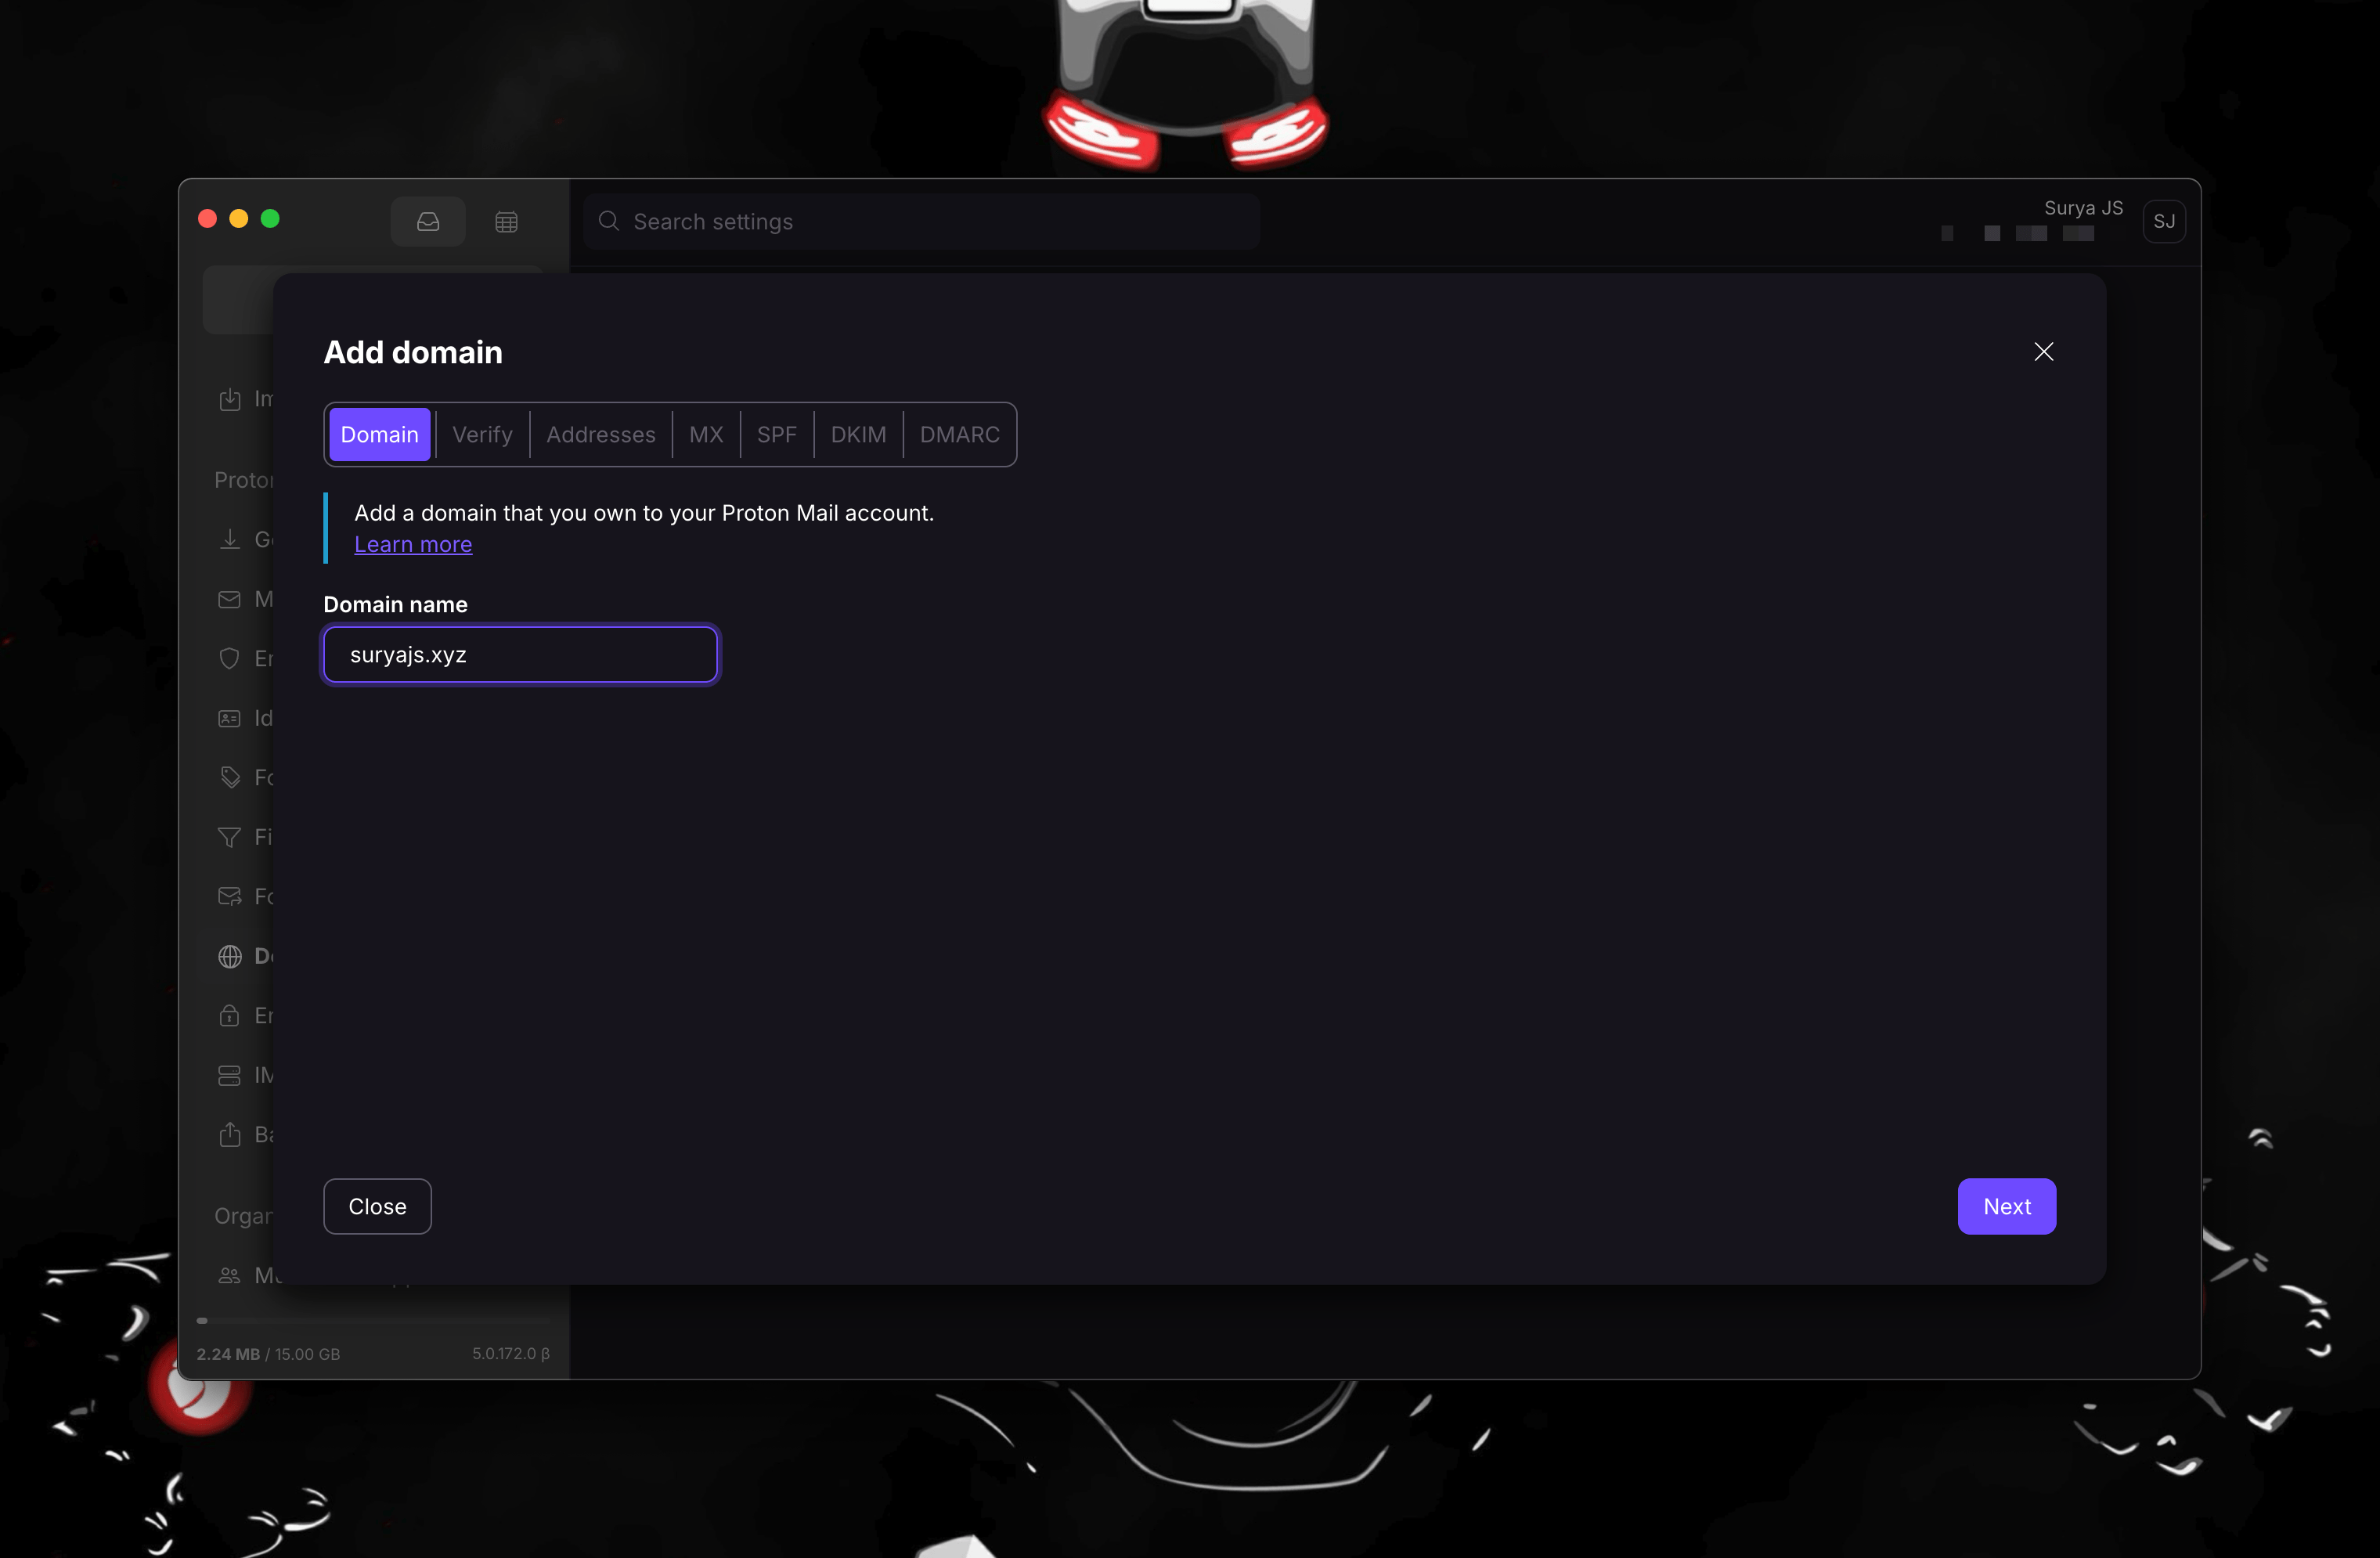
Click Add domain, type your domain, and confirm with your Proton password when it asks.
Step 3: Prove the domain is yours
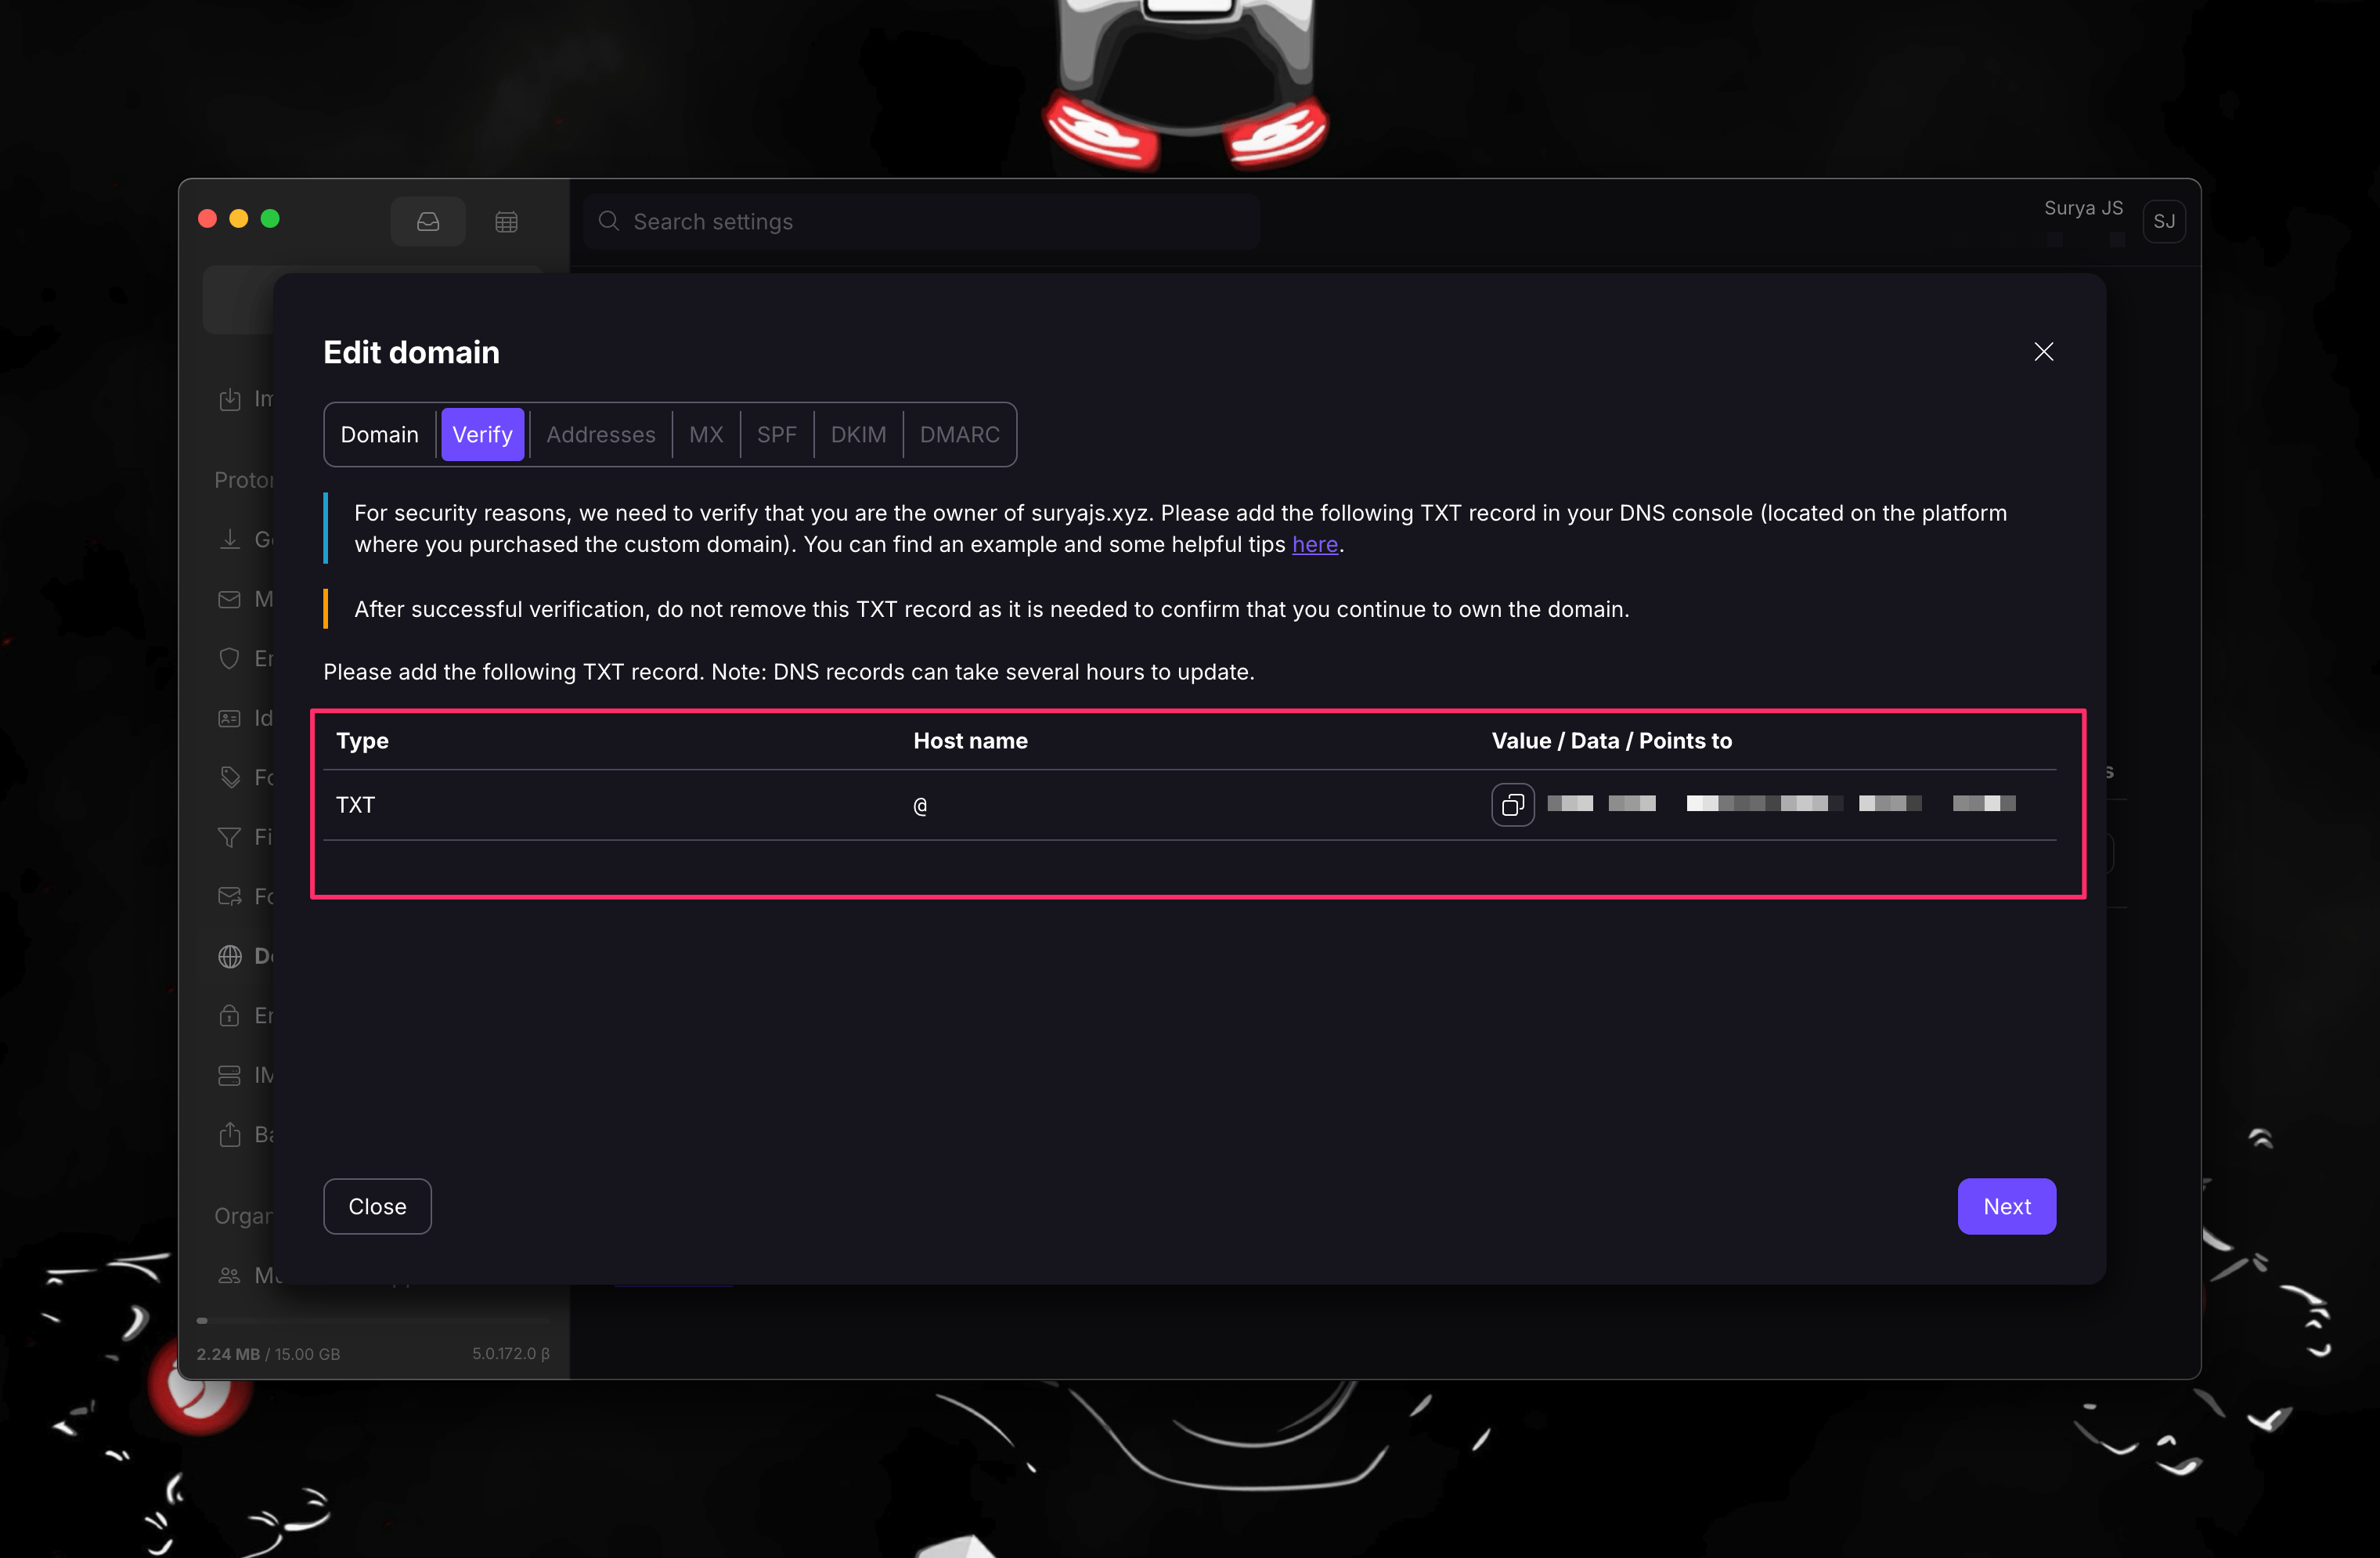
Proton needs to know you actually own this domain, otherwise anyone could claim it. It does that by giving you a small piece of text and asking you to add it to your DNS. Only the owner can do that.
Proton shows you a TXT record that starts with protonmail-verification=.
Now log in to Cloudflare (or wherever your domain’s DNS is).
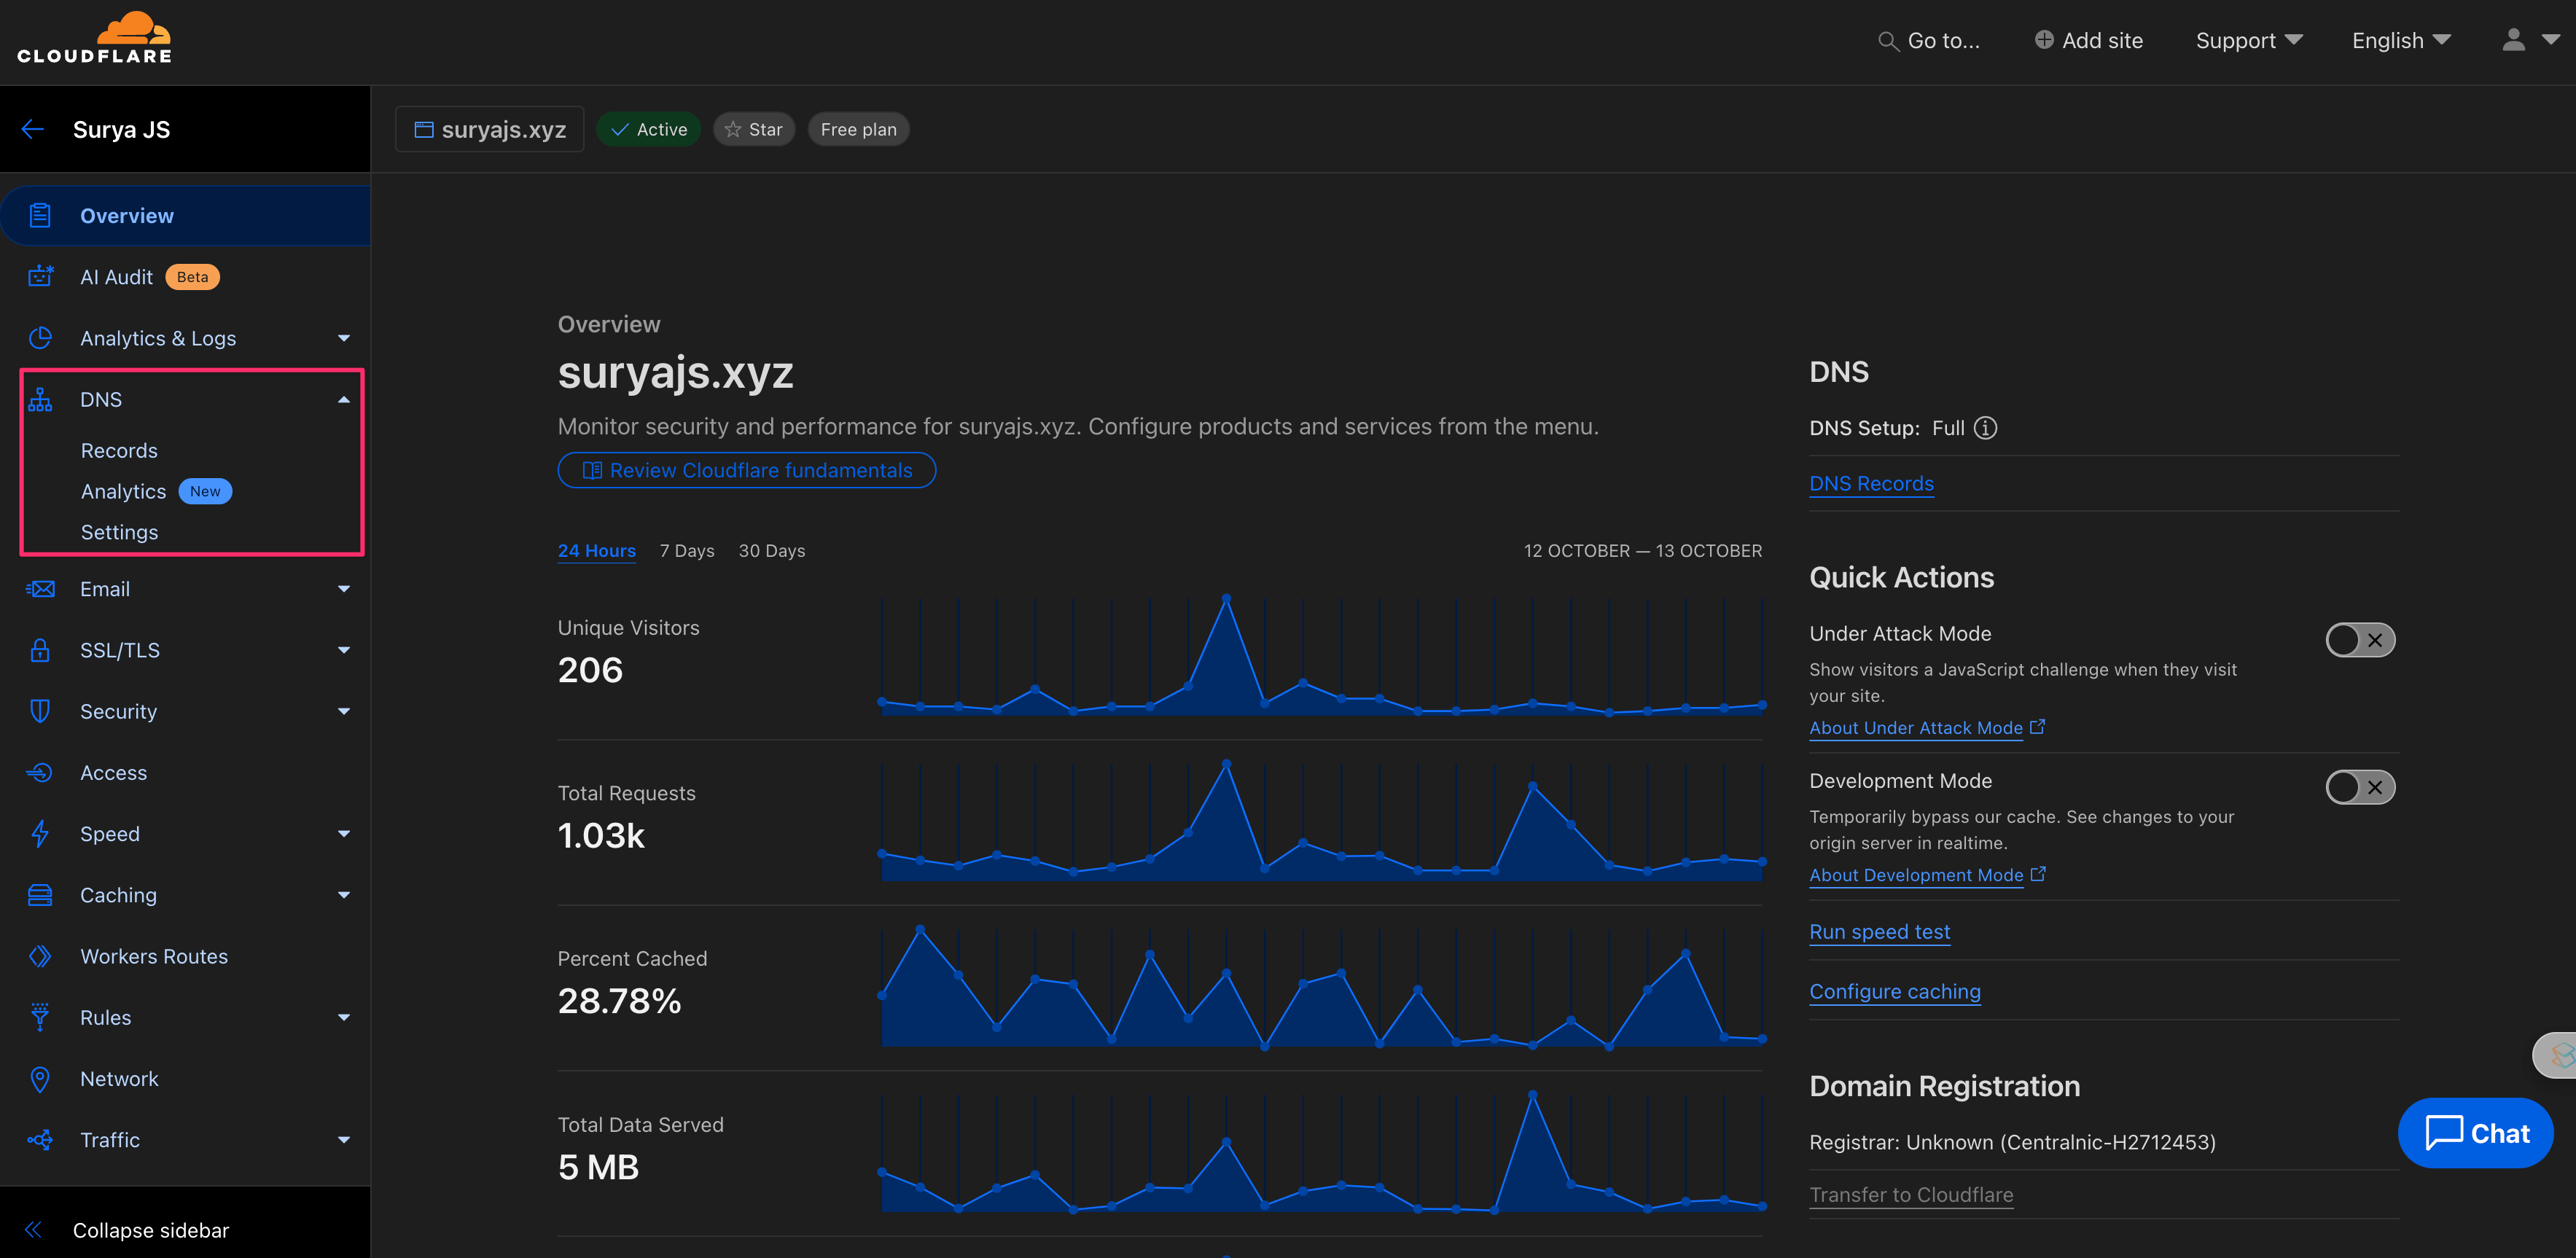
Open your domain and go to the DNS section.
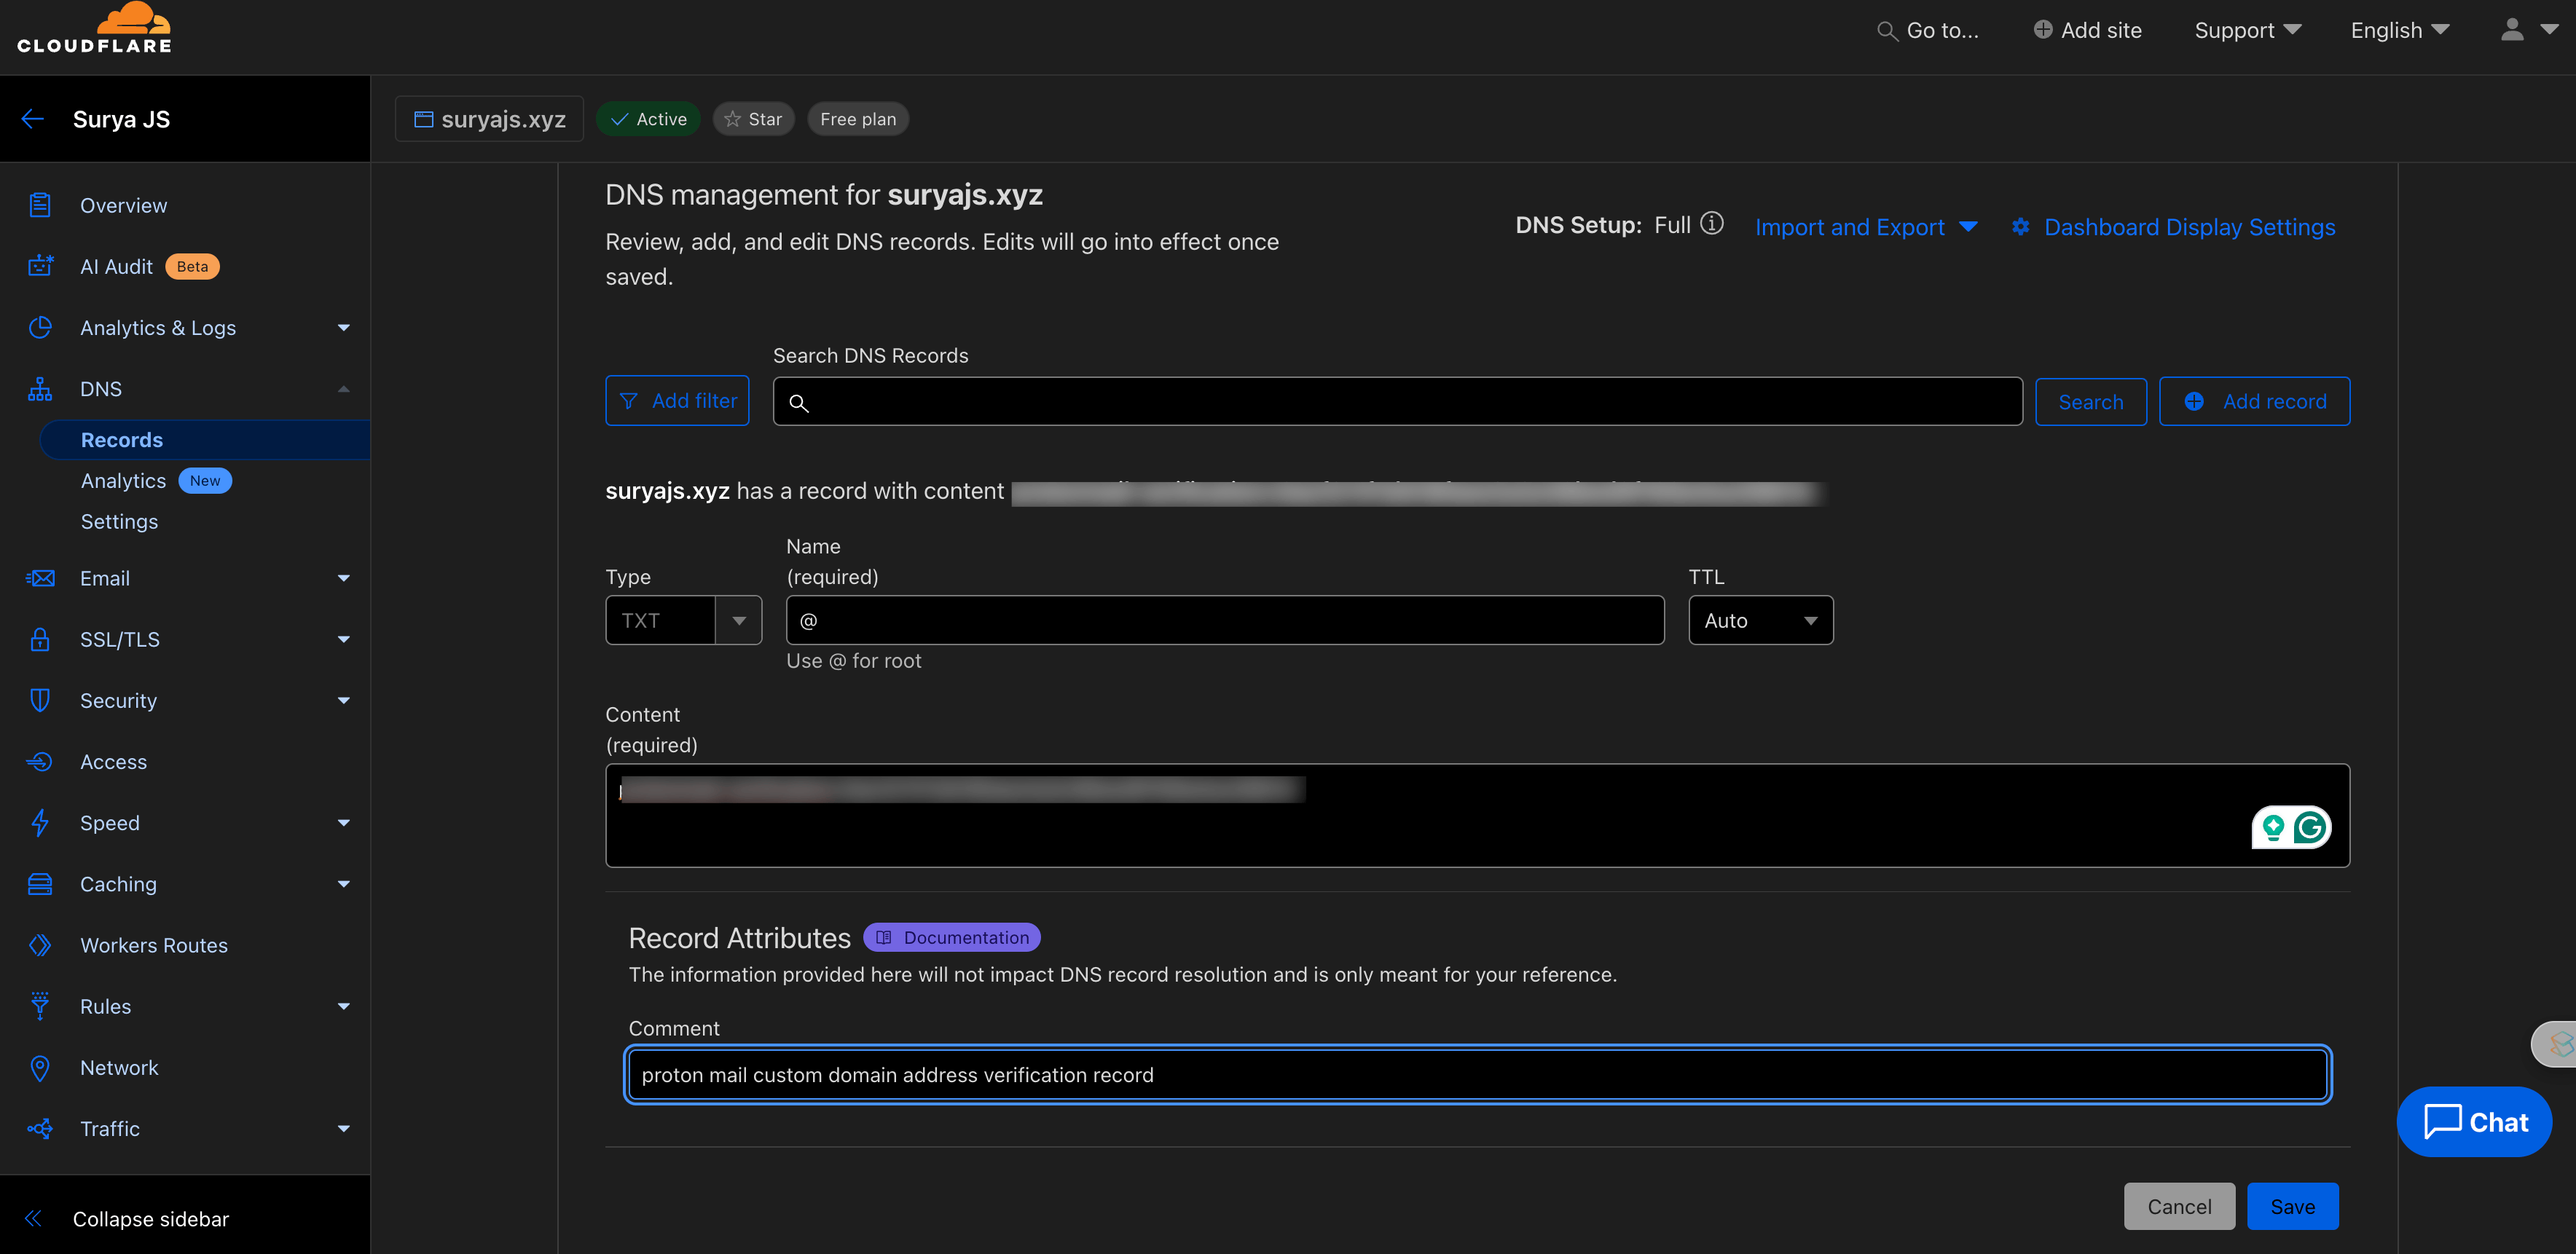
Add a new TXT record with @ as the name and Proton’s text as the value. Copy it exactly.

Go back to Proton and click Verify. It can take a few minutes for Proton to see the new record, so if it fails the first time, wait a bit and try again.
Step 4: Create your address
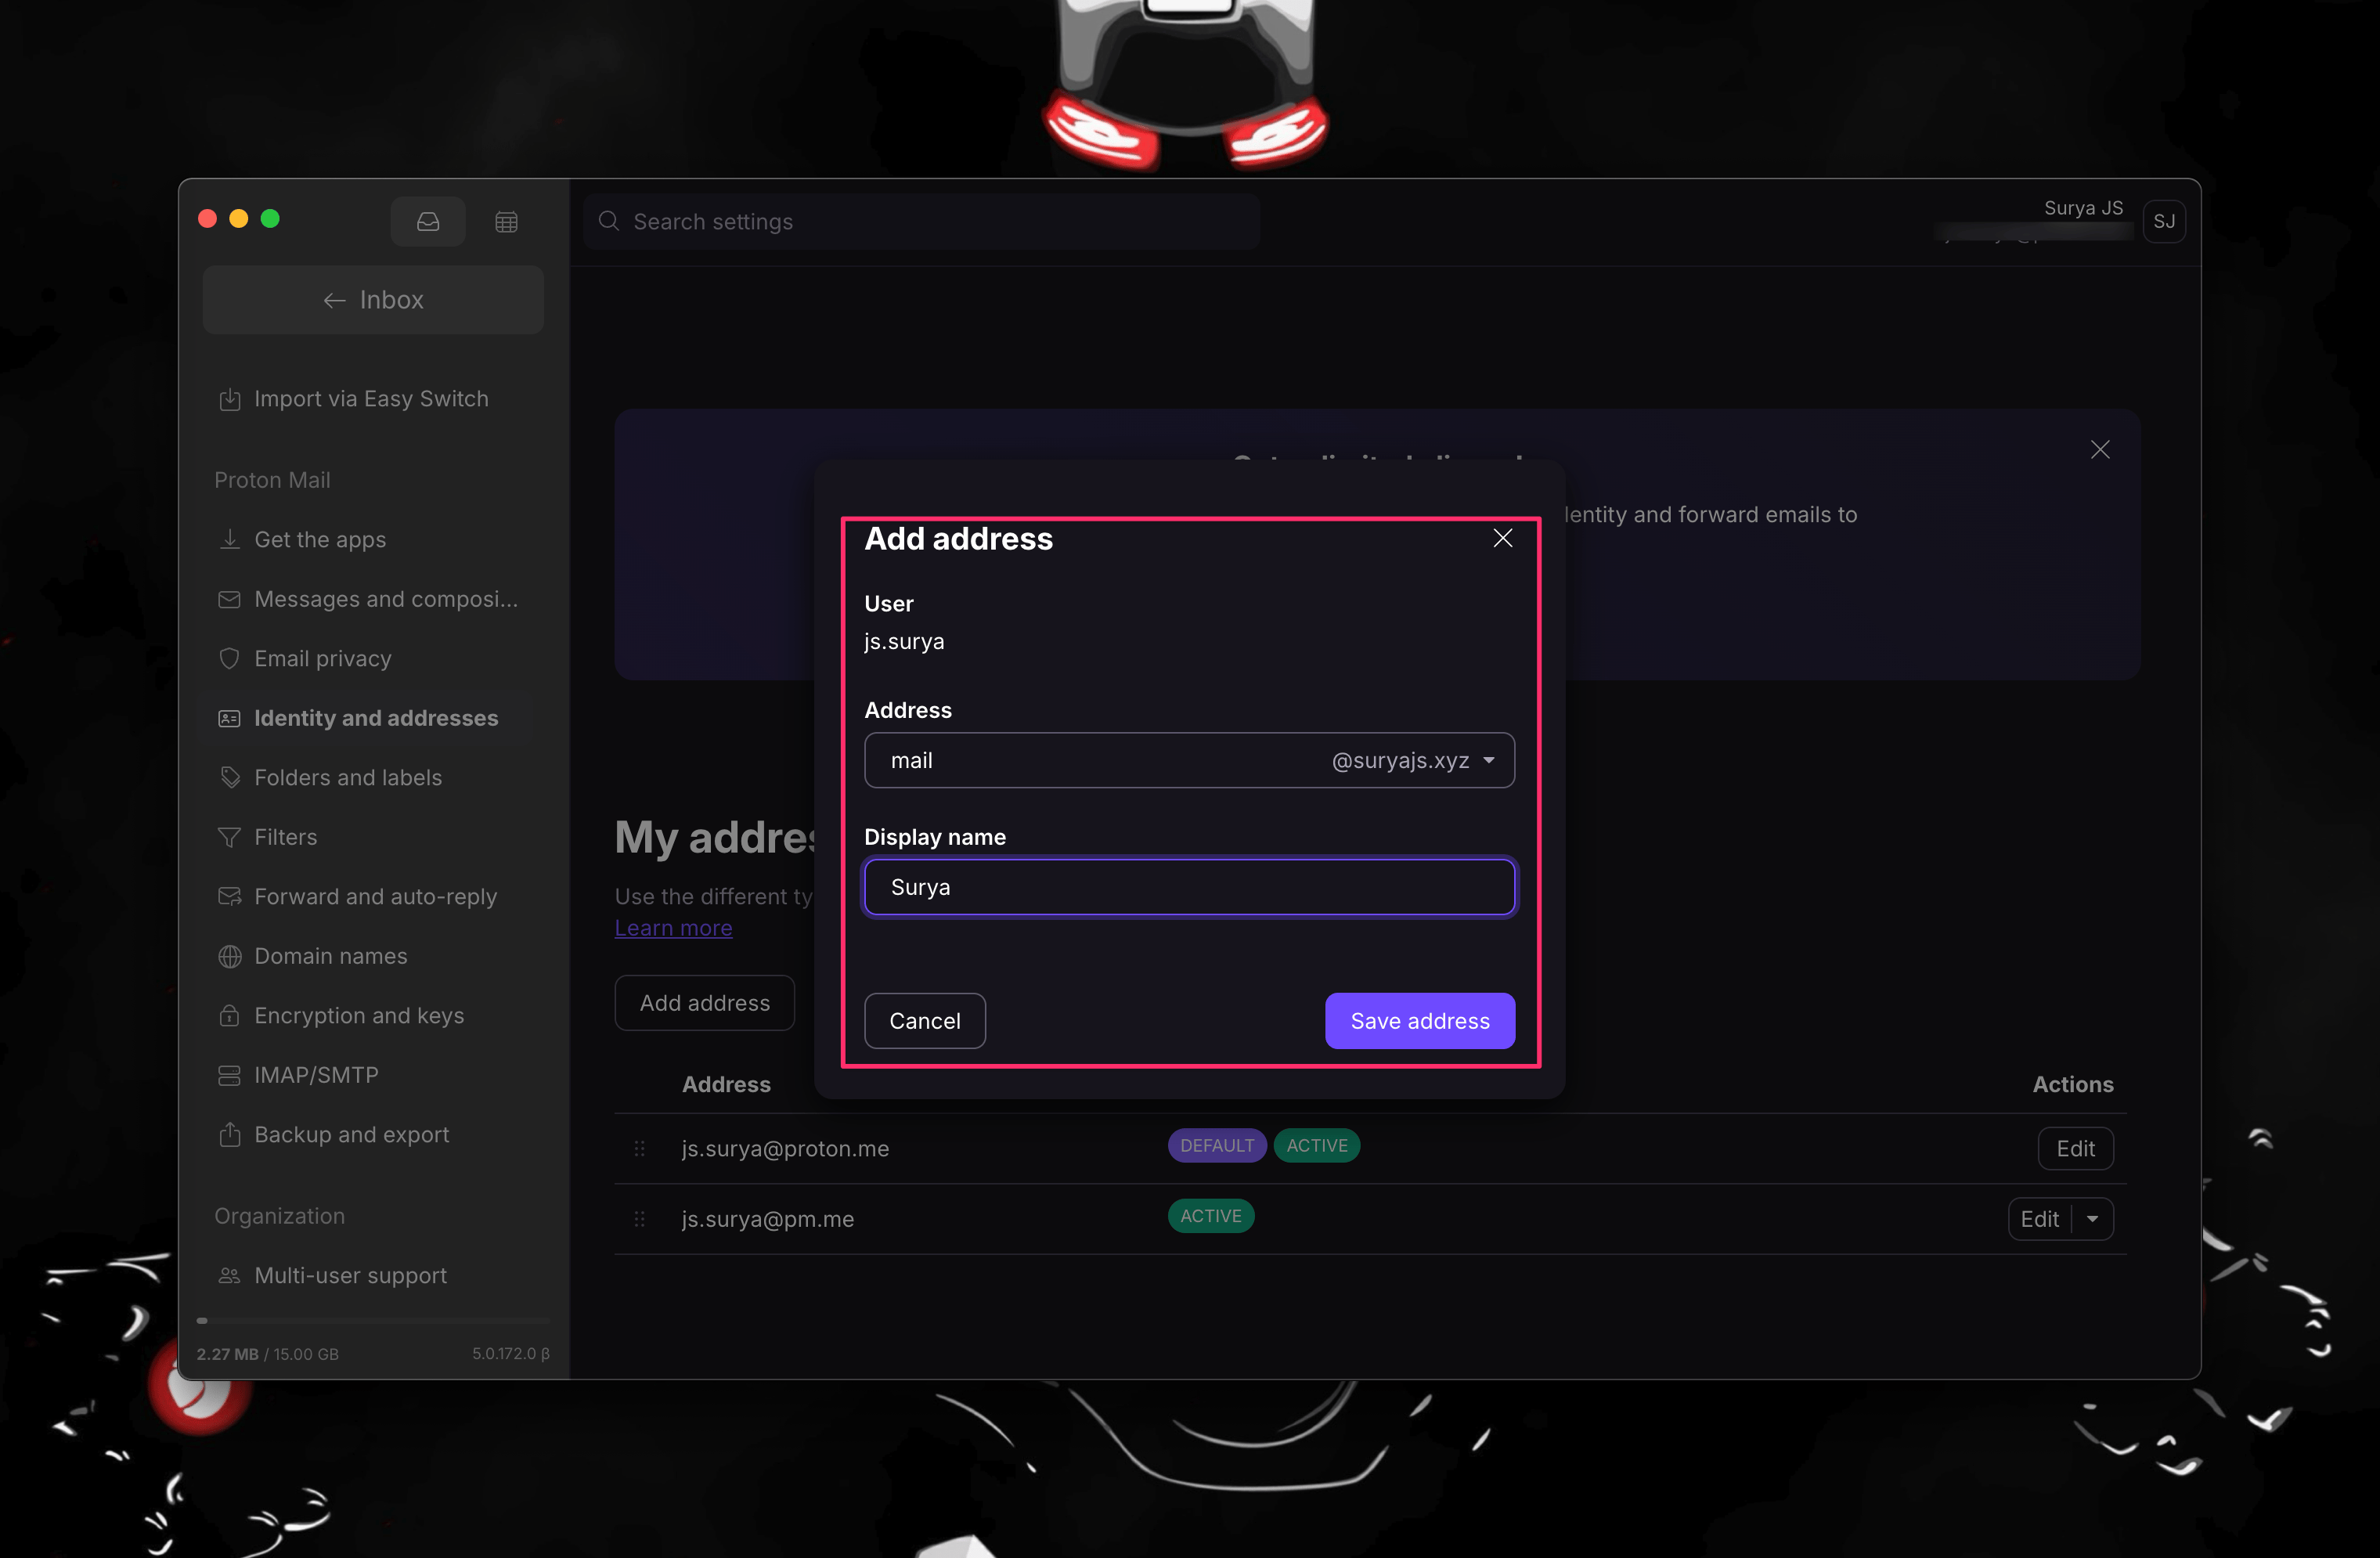
Once the domain is verified, open it in Proton’s domain settings and click Add address. This is where you choose the actual address, like [email protected].
You can’t receive mail on it yet. That’s what the next records are for.
Step 5: Add the email records
There are four kinds of records to add. I found it easier to understand them by thinking of email like a postal service:
| Record | What it does | Postal version |
|---|---|---|
| MX | Tells the world where to deliver your mail | Your post office address |
| SPF | Lists who’s allowed to send mail as you | A list of people allowed to sign your letters |
| DKIM | Signs every email you send | A wax seal that proves the letter wasn’t opened or faked |
| DMARC | Says what to do with mail that fails these checks | “If the seal is broken, don’t deliver it” |
Without MX you can’t receive anything. Without the other three, your emails are much more likely to land in people’s spam folders.
If you use Cloudflare, every record below must be set to DNS only (grey cloud), not Proxied (orange cloud). Email doesn’t work through Cloudflare’s proxy.
MX records: where your mail goes
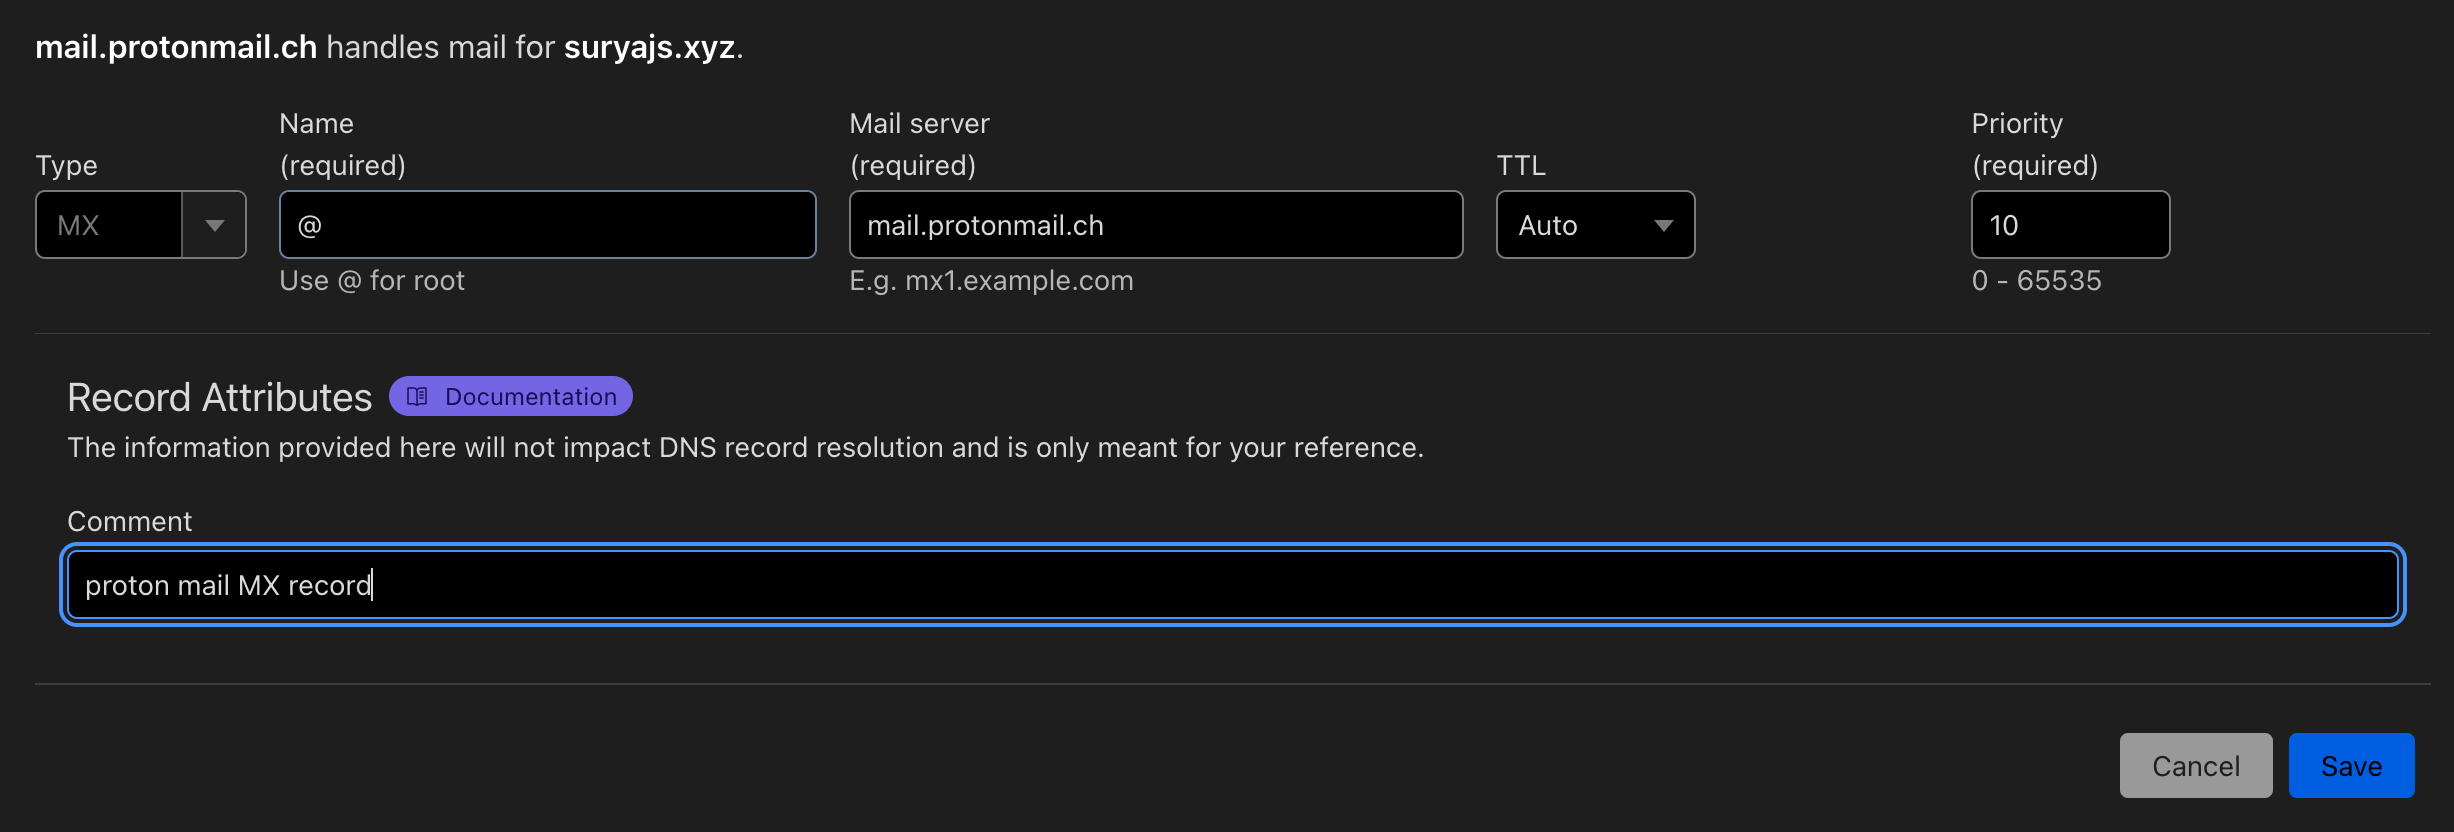
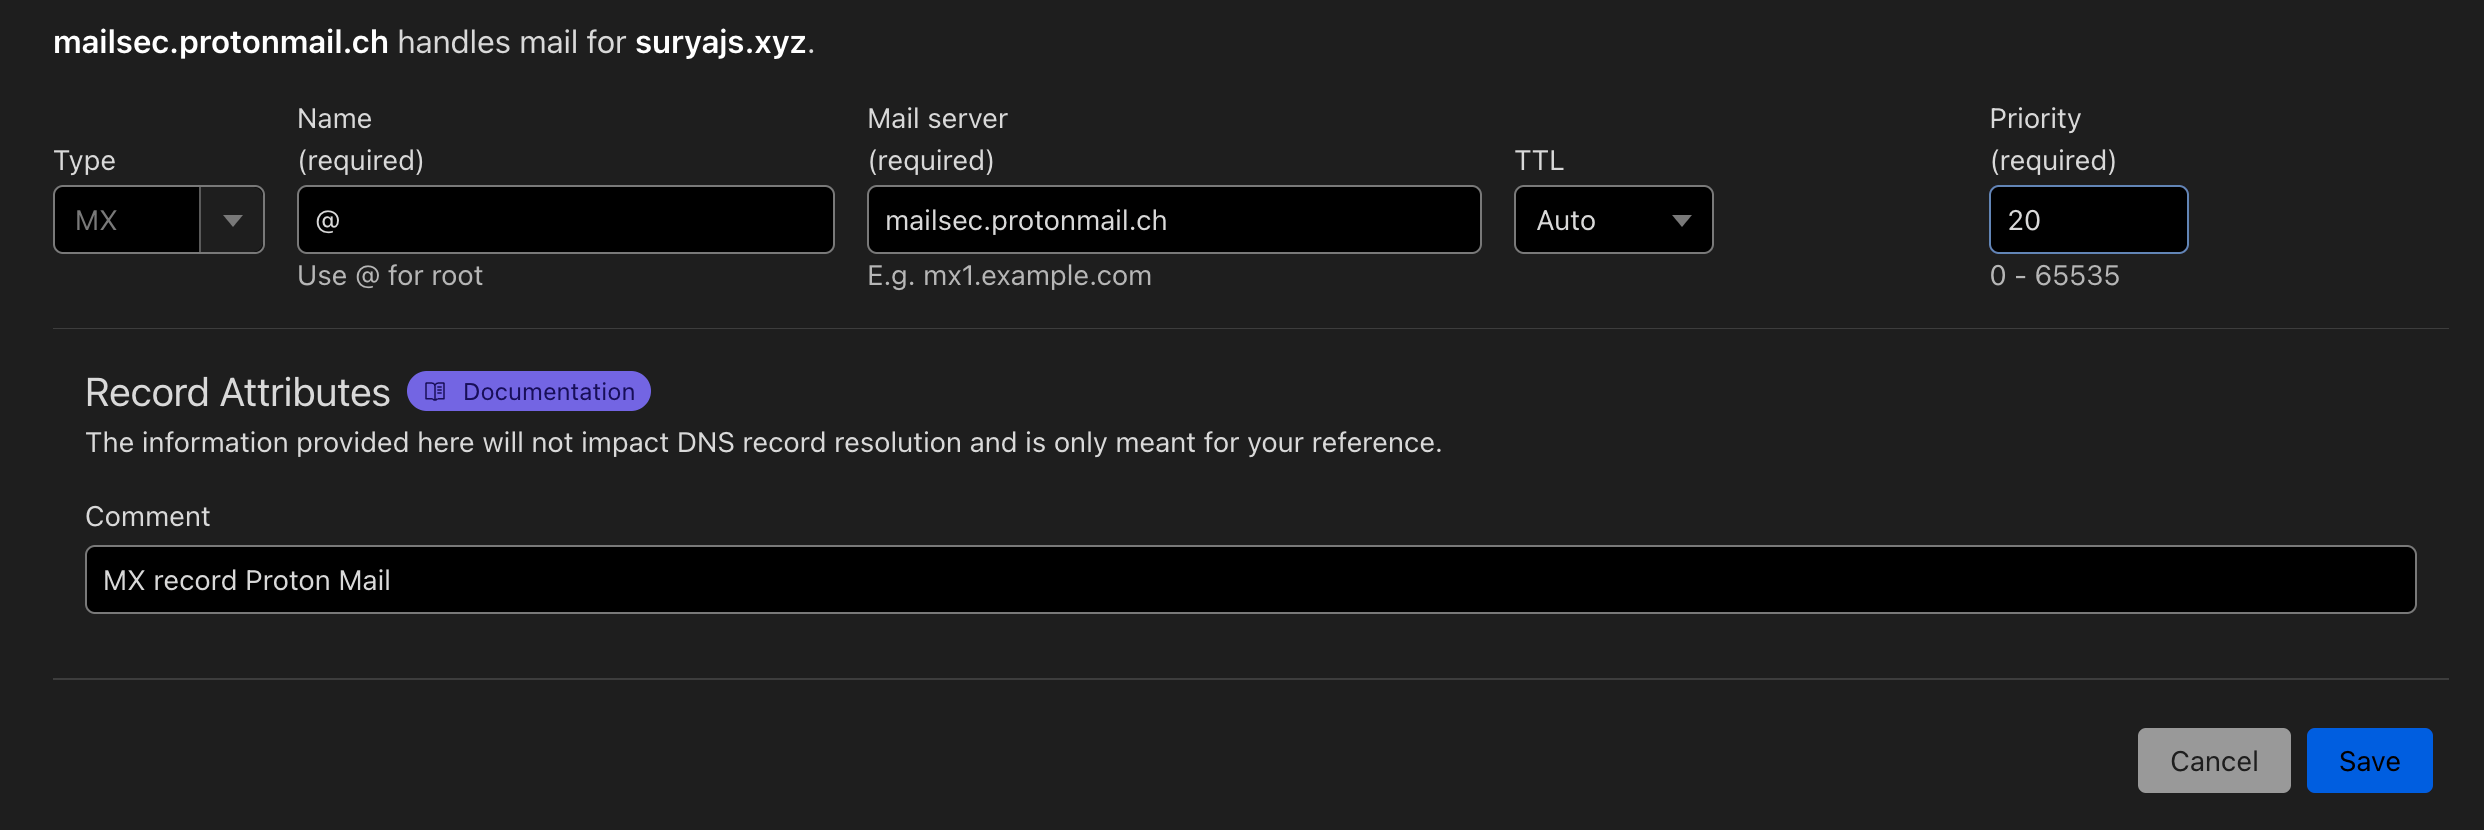
Add two MX records. The “priority” number decides which one is tried first. Lower means first.
| Type | Name | Mail server | Priority |
|---|---|---|---|
| MX | @ | mail.protonmail.ch | 10 |
| MX | @ | mailsec.protonmail.ch | 20 |

If your domain already had other MX records from an older email setup, delete them. Otherwise some of your mail might still go to the old place.
SPF record: who can send as you
Add one TXT record:
| Type | Name | Value |
|---|---|---|
| TXT | @ | v=spf1 include:_spf.protonmail.ch ~all |
This basically says “Proton’s servers are allowed to send email for this domain.”
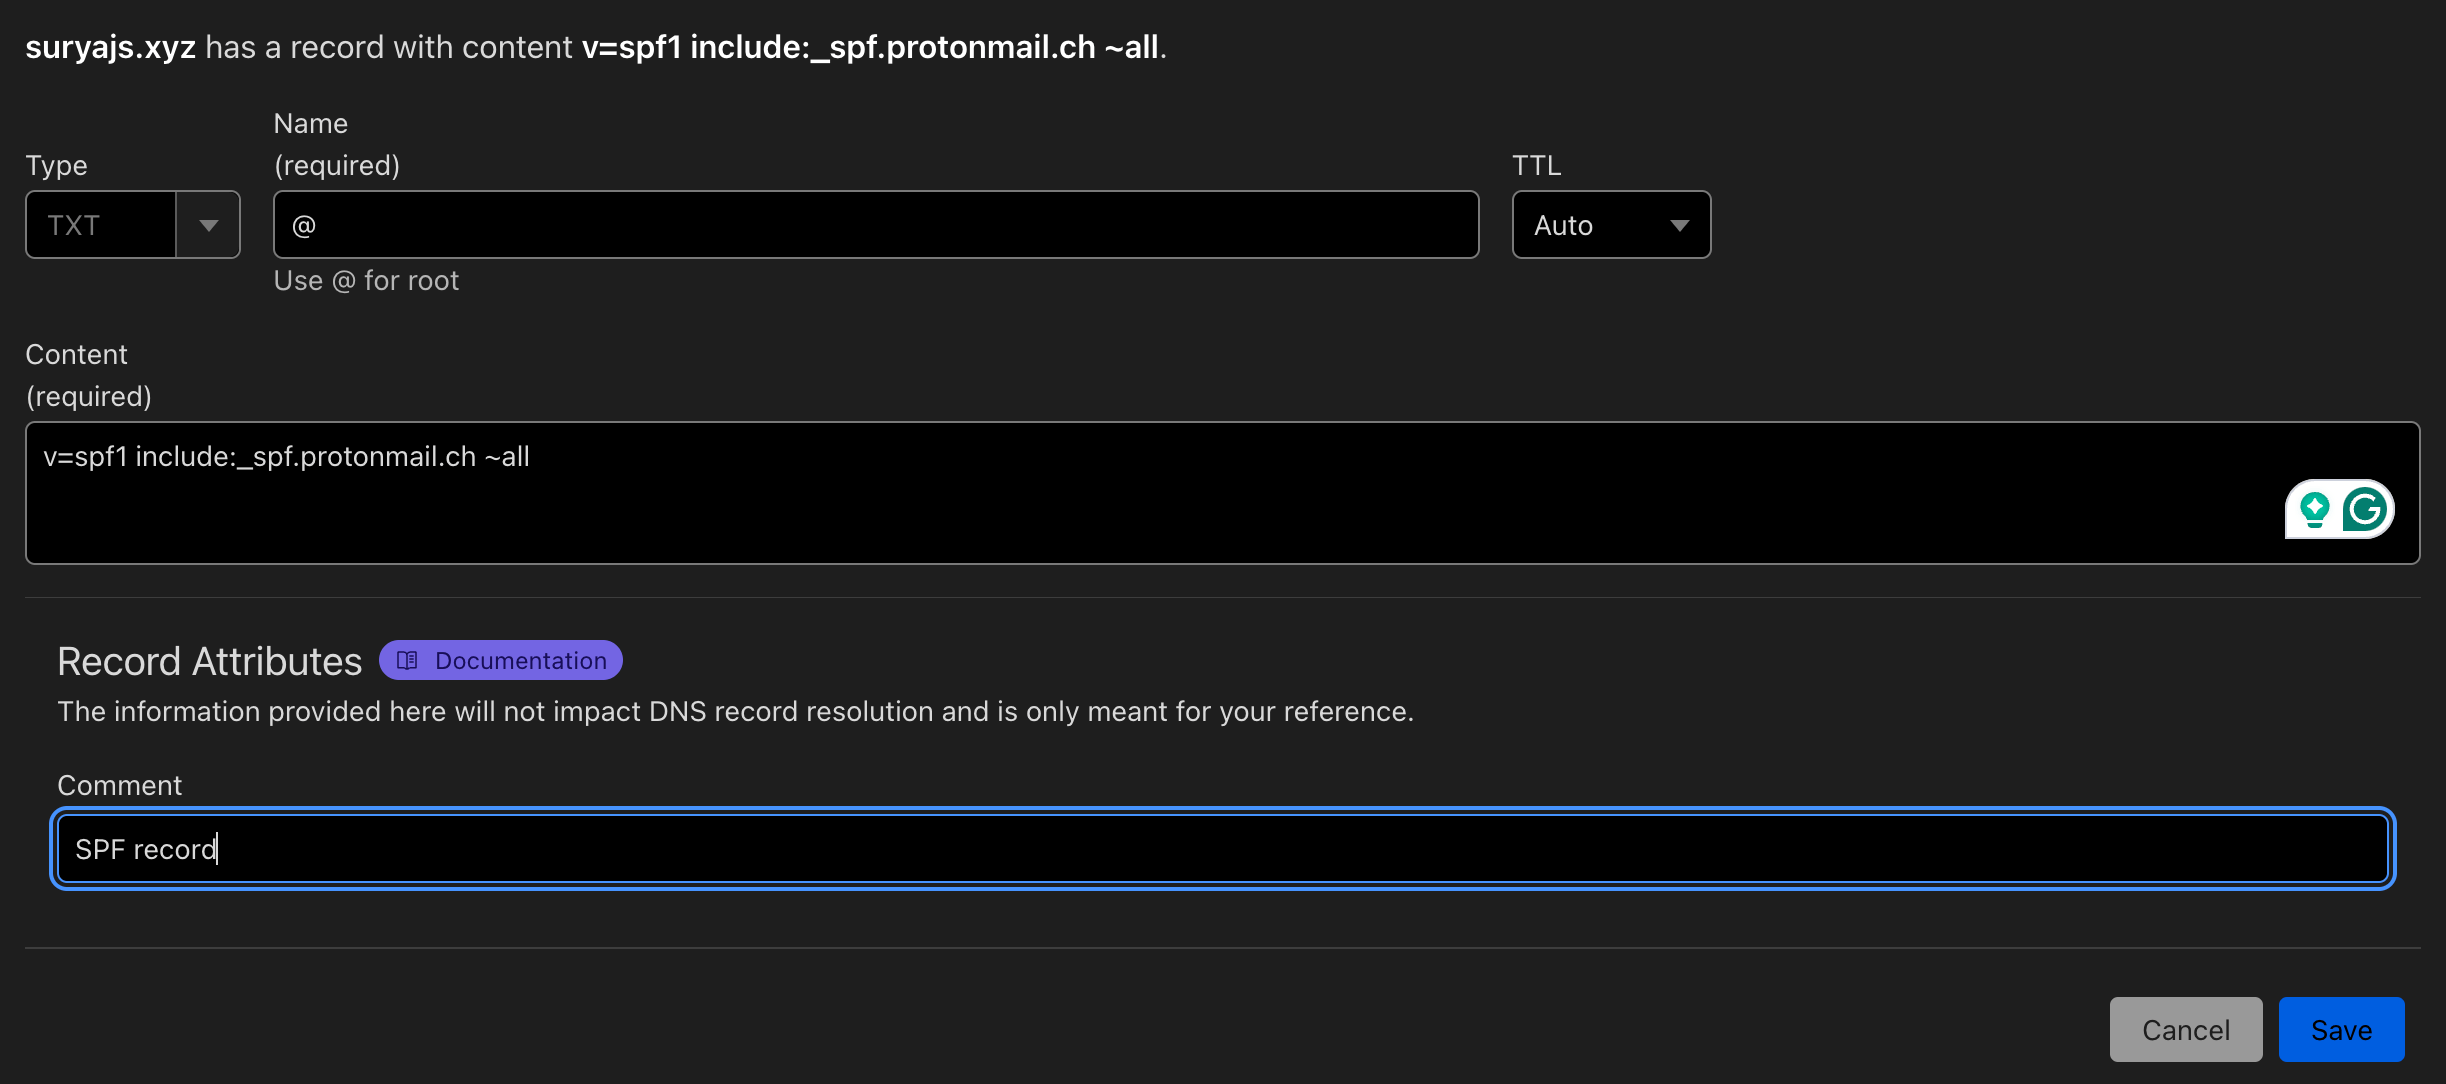

A domain should only have one SPF record. If there’s already one, edit it instead of adding a second.
DKIM records: the signature
Proton gives you three CNAME records for DKIM. You’ll find them in Proton under your domain’s settings, in the DKIM tab.
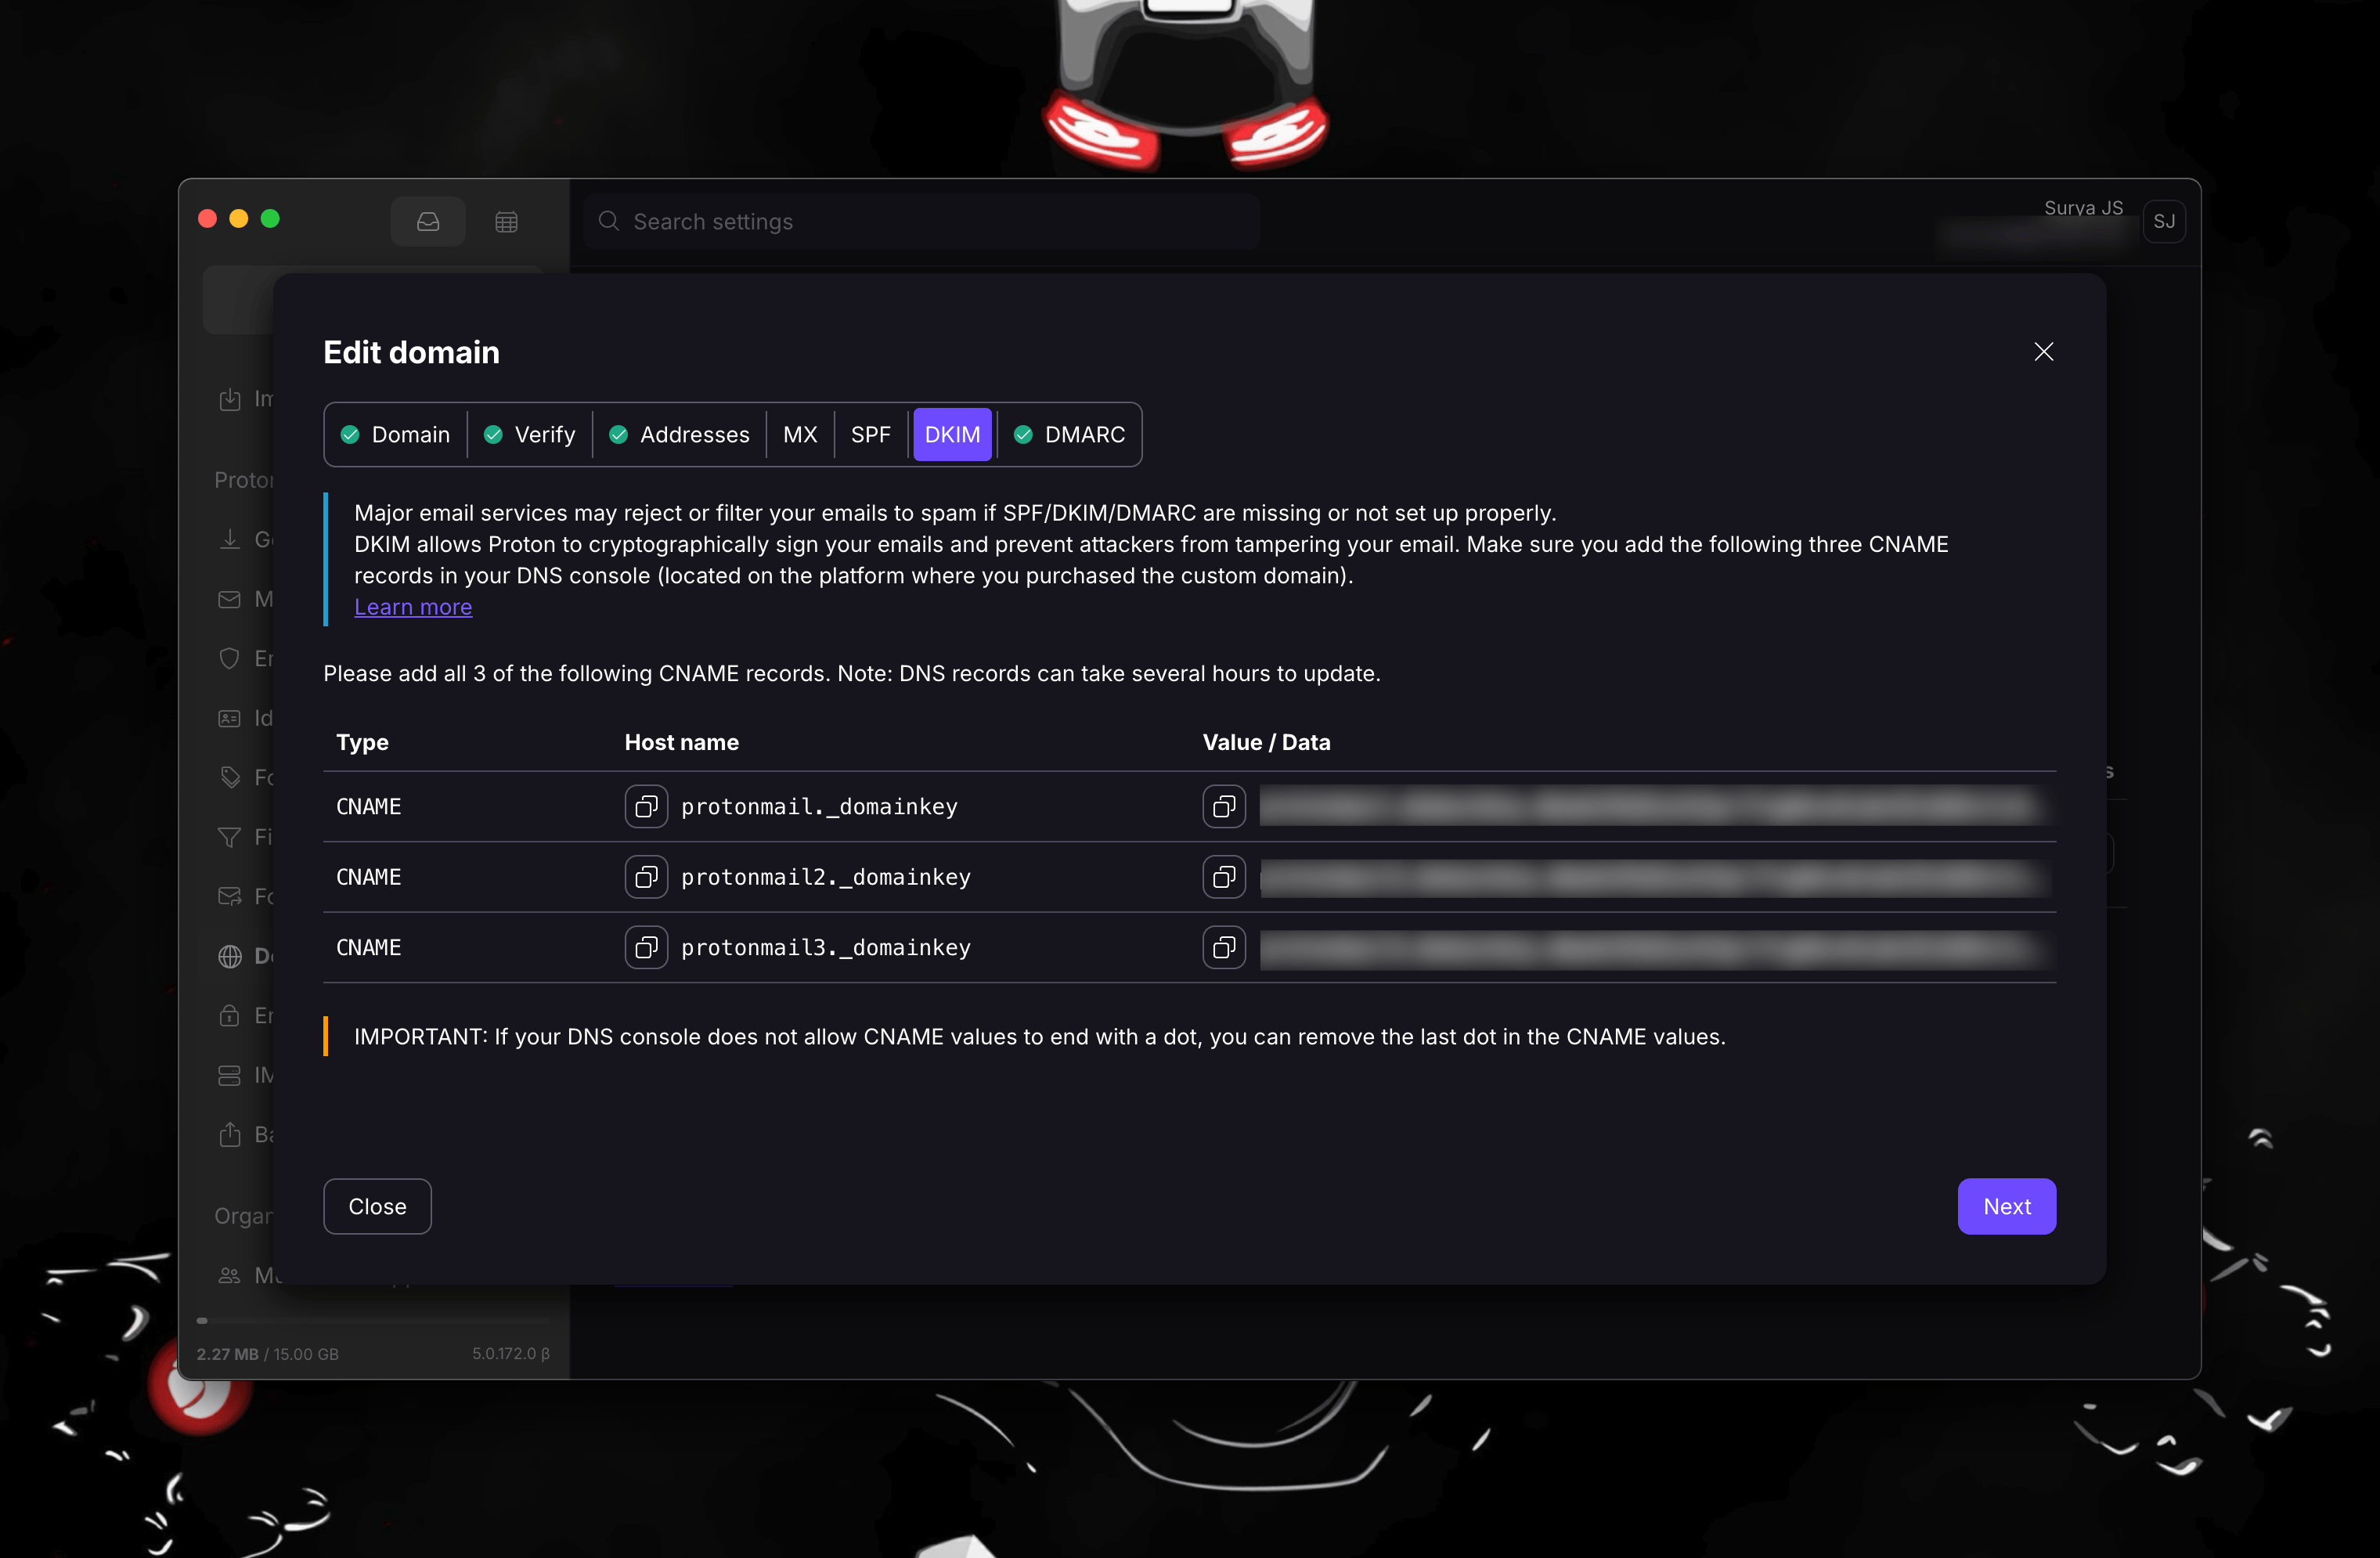
The names are always the same:
protonmail._domainkeyprotonmail2._domainkeyprotonmail3._domainkey
The targets are long and unique to your domain, so copy them from Proton rather than typing them. In Cloudflare, add each one as a CNAME record and make sure the proxy is turned off.
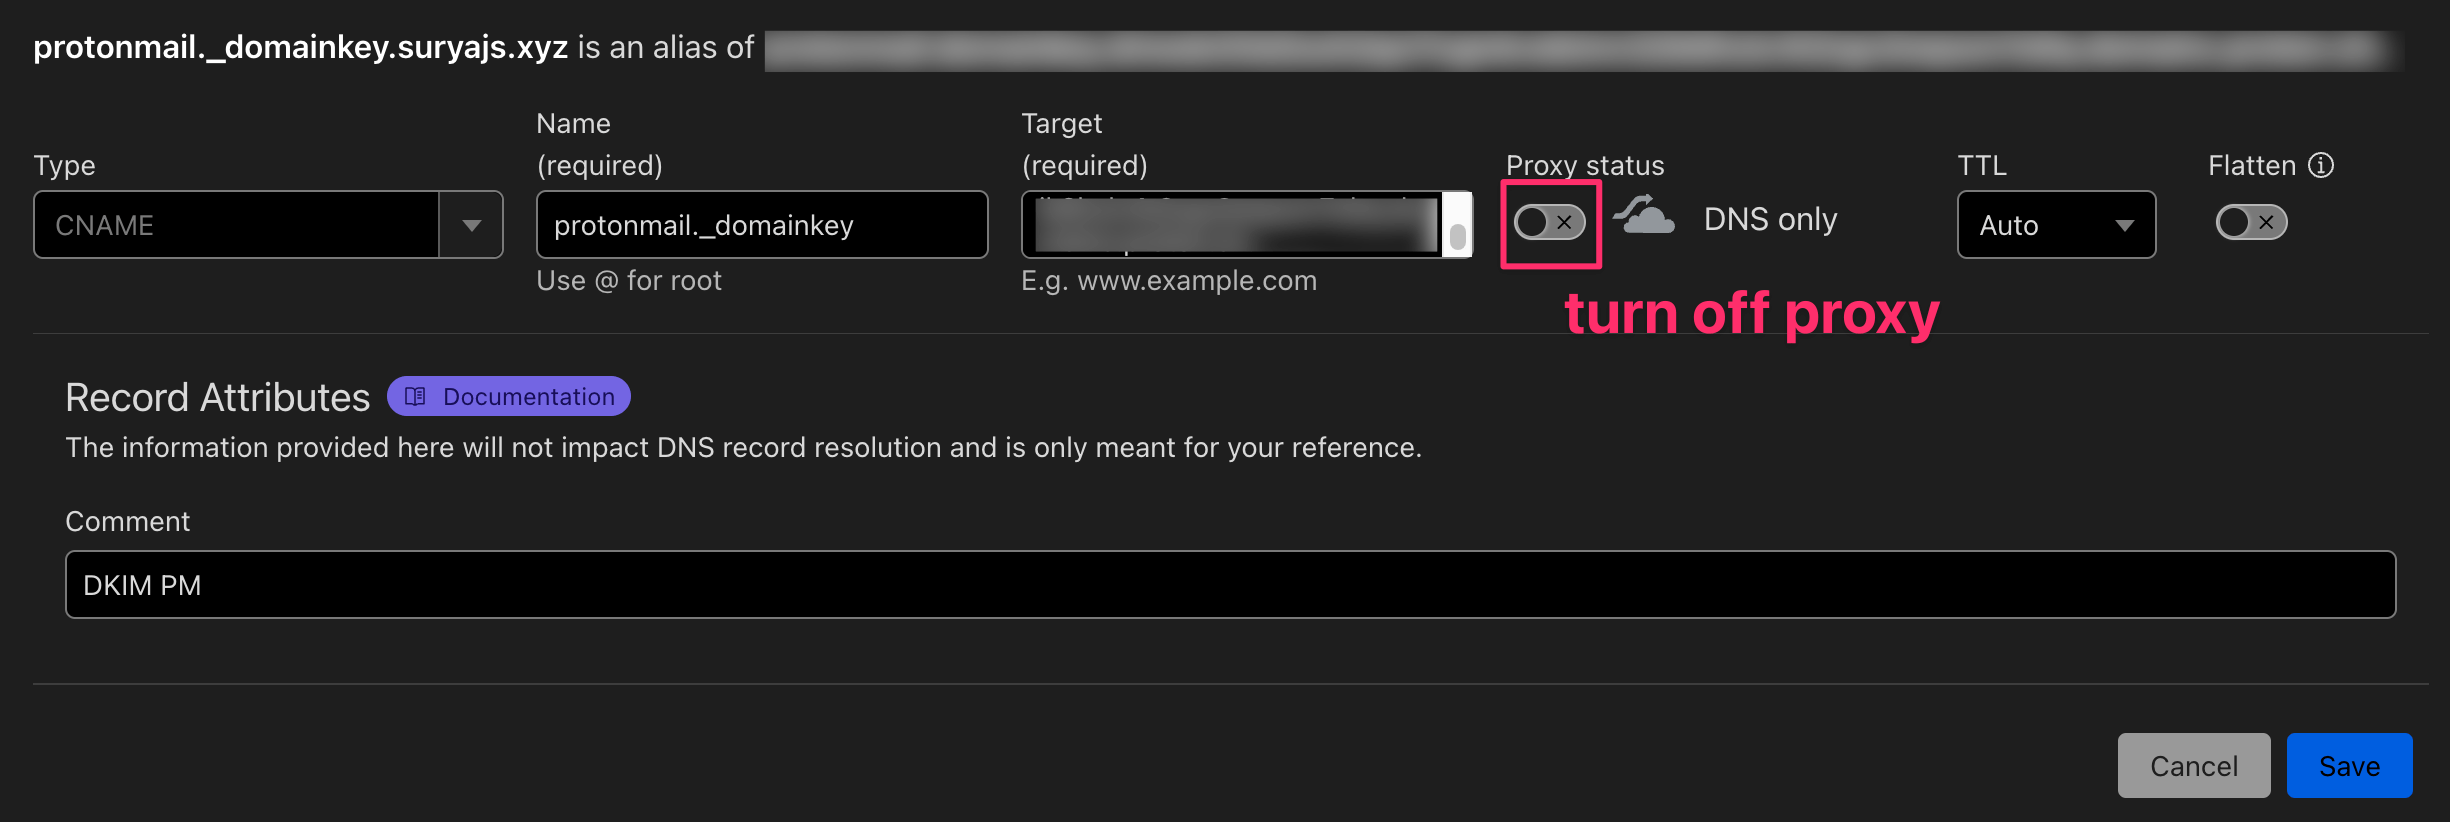

If Cloudflare complains about the dot at the end of the target, you can remove it. Proton mentions this too.
DMARC record: what to do with fakes
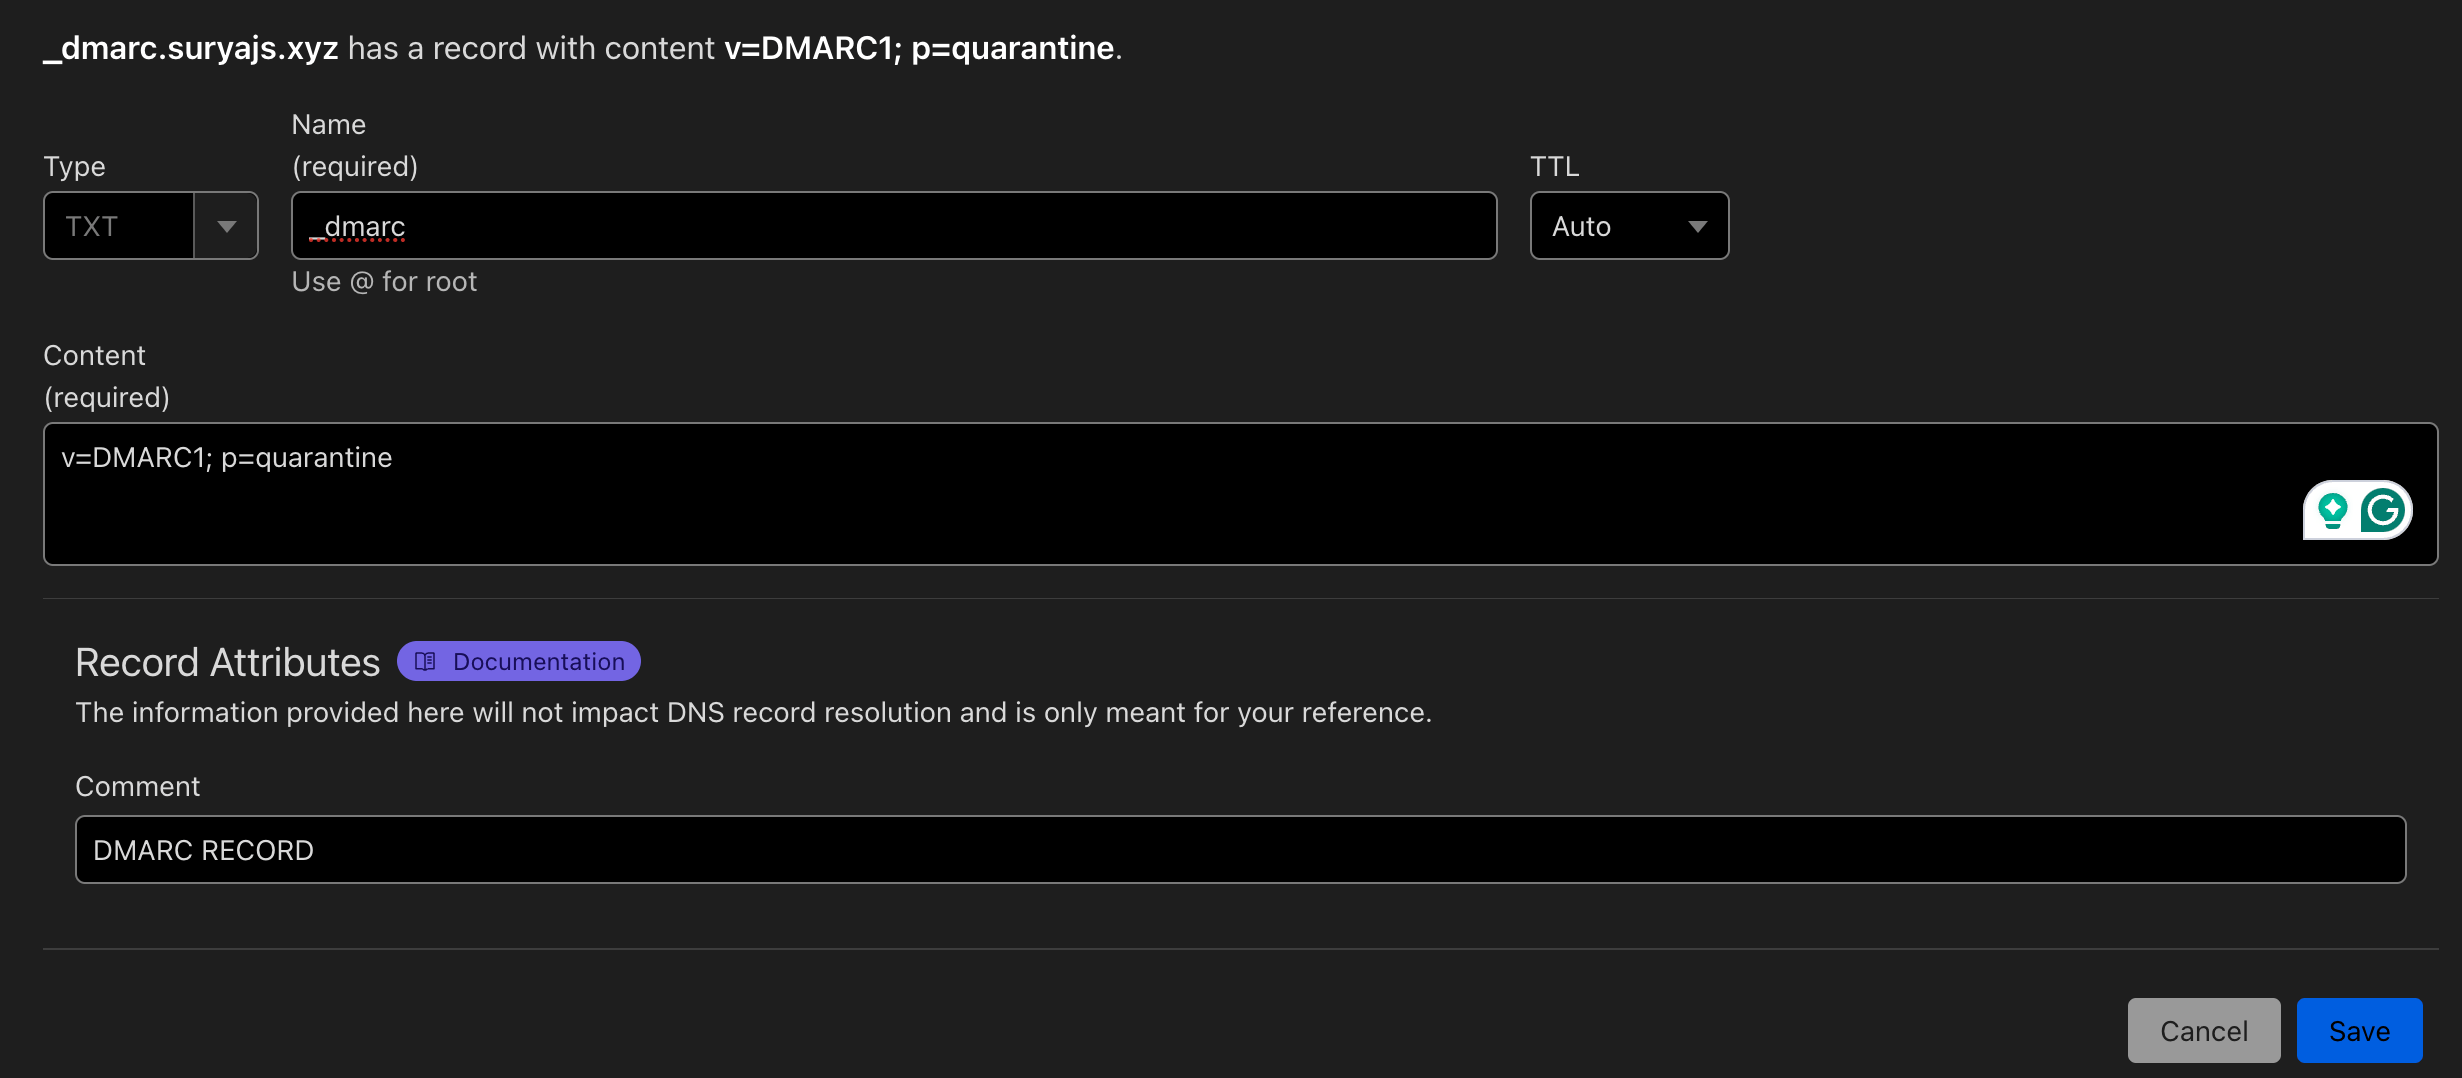
Add one more TXT record:
| Type | Name | Value |
|---|---|---|
| TXT | _dmarc | v=DMARC1; p=quarantine |
p=quarantine tells other mail servers: “if an email claims to be from my domain but fails the checks, put it in spam.” This stops people from easily sending fake emails pretending to be you.
Step 6: Wait a little
DNS changes don’t show up everywhere instantly. Usually it’s a few minutes, sometimes a few hours. Make a cup of tea.
Step 7: Check everything is green
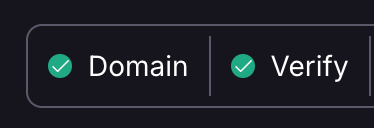
Go back to your domain in Proton. It checks the records automatically. When everything is set up correctly, you’ll see green ticks next to each one.
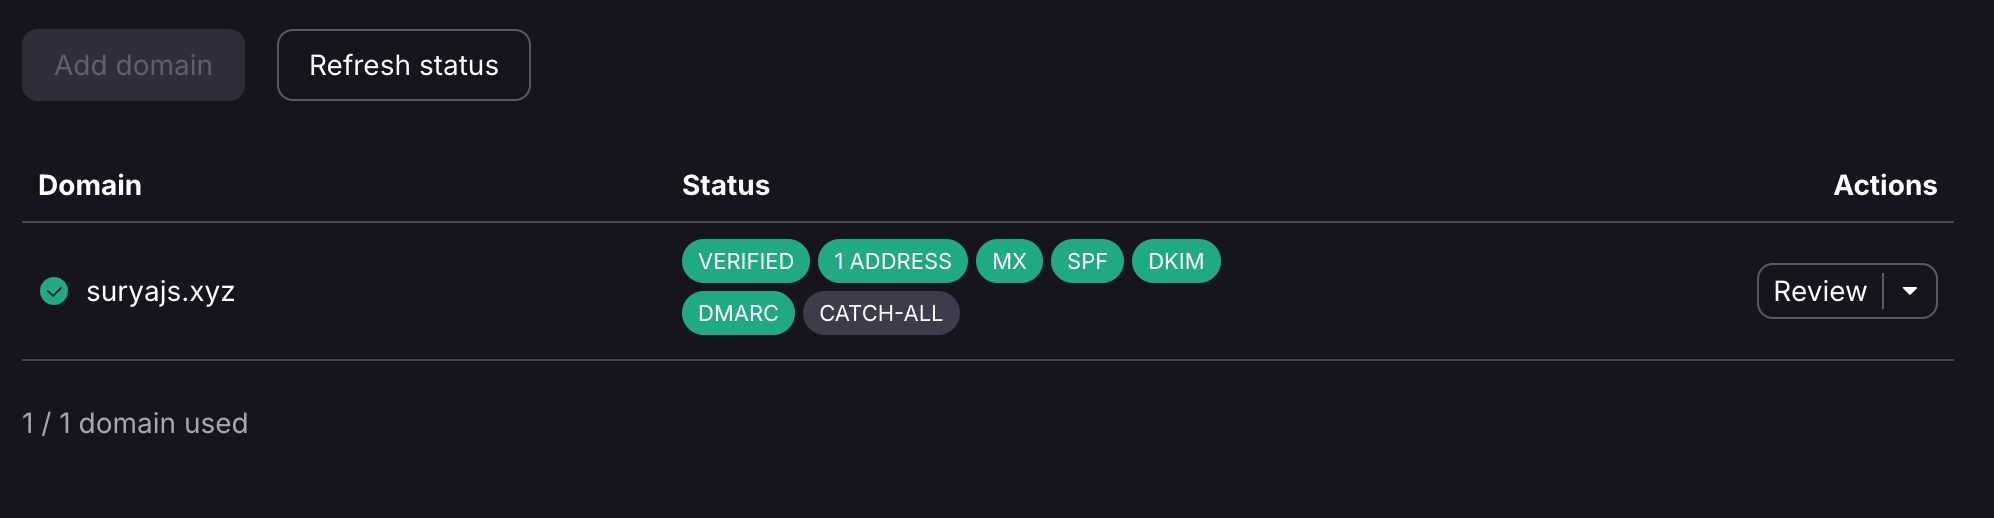
If one stays red, the most common causes are a typo in the value, a record that’s still proxied in Cloudflare, or an old record you forgot to delete.
Step 8: Send a test
Last step:
- Send an email from your new address to another account, like a Gmail.
- Reply to it, so you also test receiving.
- Check it didn’t land in spam.
If both directions work, you’re done. You now have an email address that’s actually yours.
Was it worth it?
For me, yes. The setup takes one evening, and after that you never think about it again. The biggest win is that the address stays the same even if I change providers one day. I’d just point the MX records somewhere else.
If you have any trouble with a step, leave a comment and I’ll try to help.